Showing posts with label Dessert. Show all posts

Monday, October 15, 2012

Rockport Apple Weekend


 I had kind of lost the inspiration to post here for a while.  I felt that I had run out of fun stories, or anything meaningful to say.
 Perhaps that is slowly coming back.
 So instead I wanted to share with you a montage of photos taken by a friend of mine (Thank you Leila!) a few weekends ago.  When I saw all of these, I thought I had just participated in one of those super-posh food magazine weekends.  You know what I mean, when you look through food magazine articles about some fabulous get-together that super wealthy and exclusive people have all while trying to appear as casual as humanly possible.
 I went to Rockport, Mass. to visit some friends, and while I was there, I put them to work.  We cut, cored and peeled 2 full pecks of apples, which in lay-speak is approximately a “sh*t-ton”, or so I was told.  We then canned those apples for apple pie filling.  2 pecks turned out to be far more than we needed, as I managed to make 12 cans (2 of which exploded and needed to be refrigerated and not stored) and 2 apple crisps.

 But the beauty of a rainy cool autumnal day when apple, cinnamon and sugar mingle together throughout a tiny apartment overlooking a sleepy fishing harbor reawakened something creative inside of me.  Well, that or the mixed drink we created using the leftover apple and lemon preserving juice.  Either way, perhaps I will make a reappearance here.


Wednesday, April 25, 2012

Super Power Cookies

In college, my girlfriends and I looked for any opportunity to dress up and have a party.  When I say dress up, I’m not referring to nice clothes; no I am referring to costumes.  And in college this all equates to an excuse to drink and decorate your dorm room.  Just like Halloween but multiple times a year.  As with Halloween, the costumes are, ahem, not the most modest. 
Sophomore year, a friend of mine was taking a course on super heroes (I know, it seems ridiculous, but I took two classes that involved quilts).  She managed to convince her professor that she should get extra credit if she threw, and documented, a “Super Heroes” party.  He agreed.  My friends all went into crazy planning mode, with mix tapes, theme drinks, and decorations. 
At the time, I found a recipe online for “power cookies” and I figured this would be appropriate fodder for keeping super powers up.  Now, this was before I had really honed my skills in the baking department, and needless to say these cookies were not very tasty.  Although, if you put enough intoxicated college students in a room with cookies – even terrible cookies – they will get eaten.
Recently, I had been thinking about those cookies.  One, because a friend mentioned that in London it is totally acceptable to have fancy dress parties, akin to our Super Heroes party, and I thought it would be wonderful if all of us know at the very end of our 20’s were to do something like that.  Ridiculous, but wonderful. 

Second, I have seen lots of recipes and even ads for something called breakfast cookies.  In looking at the ingredients or nutritional value of said cookies, I would not consider them acceptable for breakfast. And I suppose that some of these cookies probably are better than a pop tart, I still wouldn’t want to each that much sugar to start my day. 
In going back to the original power cookie recipe, I made some changes and when I tested these cookies – they were actually pretty good.  I brought them to a regatta this weekend for the rower’s to eat, and although I didn’t see too many get consumed while I was there, I heard good reports regarding the overall flavor and texture.  These cookies would be a great way to start your day, or an excellent and protein filled snack; especially if you need to keep up your super powers.

Please excuse the blurriness of this image, I took it with my phone at the regatta, while the cookies were still in the ziplock bag.

Power Cookies
As adapted from Sara Sue on allrecipes.com

I highly recommend using dried beans rather than canned beans for this.  In the original recipe, I used canned beans, and the cookies then tasted like beans.  The dried beans also yielded less moisture, so I added unsweetened, spiced, applesauce.  If you can’t find that, just get the organic unsweetened kind and add spices to the batter.

1 c. dried cannellini beans, soaked overnight, and simmer for 2 hours until soft (should yield 2 cups beans)
½ c. granulated sugar
½ c. dark brown sugar, packed
1 tsp. vanilla
1 c. unsweetened applesauce
4 cups oats
½ tsp. baking powder
½ tsp. baking soda
¼ tsp. salt
½ c. pitted dates
½ c. shredded coconut
½ c. raisins

Preheat oven to 375°. 

In a food processor, grind the oats into coarse flour.  It is not necessary for it all to be powder, as some larger bits will add texture to the cookies.  Move the flour to a bowl and add the baking powder, baking soda and salt, stir to combine.

Next, place the beans in the food processor (don’t worry about cleaning it between uses), and process until they are smooth, like a thick hummus.  Move beans into the bowl of a stand mixer.  Add sugars, vanilla and applesauce and mix until well combined. 

Add the oat flour mixture to stand mixture and mix until just combined.  Next, pulse the dates in the food processor to chop them into smaller pieces, about the size of the raisins.  Add the dates and raisins to the dough and mix until incorporated. 

Line two baking sheets with parchment paper.  Scoop dough with a heaping table spoon and loosely shape into a ball.  Press the dough down slightly on the board, but not to flatten the cookies.  The cookies will not rise or flatten while baking, so there is no need to space them out very much.

Bake for 15-17 minutes, rotating half-way through, until golden on top.  Allow to cool and store in an airtight container.


Wednesday, April 11, 2012

Pie Fail

I’ve been in a slump recently.  I must admit, these last few weeks have resulted in some epic fails in the kitchen. When that happens I tend to lose my temper and begin to throw stuff (equipment, food, etc.) around the kitchen.  I also then decide not to eat dinner but to have multiple glasses of wine instead.
Joe really enjoys it when that happens.

Case in point, I decided to use up some of the frozen fruit from last summer that is residing in my freezer.  I had a bunch of frozen strawberries, rhubarb, blueberries and raspberries.  So I figured that a strawberry-rhubarb pie would be very nice for dessert on Easter.  In fact, I have a lovely recipe for strawberry-rhubarb pie that I came up with a few years ago, that I wanted to try and make again. 
I got out my bags of frozen strawberries and rhubarb, added them to a sauce pan and began to cook them.  I thought this would help release some of the juices and extra water from being freezer-burned.  Nope, I got juice.  Just straight juice.  The strawberries completely disappeared and I had a saucepan full of liquid.  So I added some corn starch and let it bubble.  Then I added some fresh sliced strawberries.  Nothing.  I had a bright pink warm fruit soup.
So then I turned my attentions to the crust. It was perfect.  Figures. The one time I actually manage to crush the cookies fine enough and not add too much butter, my filling is what doesn’t turn out.
Not to be deterred, I decided to add egg yolks to the mixture hoping that when I baked it, it would turn into a custard. I poured the watery mess into my crust, shut the oven door and proceeded to pace around the kitchen for the next 45 minutes.  I opened the oven door approximately 40 times, which I am sure helped in the cooking process.
I reported back to Joe every time I peeked at the pie, “I think it’s gonna work!” Five minutes later, “It’s not going to work.” Another 2 minutes later, “I think it might just work!”  As you can see I was delightful on Easter Sunday. 

After the crust started to turn dark brown, I knew I needed to take the pie out and hope for the best.  It wasn’t jiggly, so I took that as a good sign.  But I fell asleep with a full belly of Easter dinner before we could try the pie.  Which I should have taken as a bad sign (for the pie that is).
The next day, after dinner I cut into my pretty pink mess and it slumped all over my pie server.  It failed.

But it tasted ok, and I have not gotten sick from it.  So I’ll take this as not quite an epic fail, just a normal sized fail.


Spiced Strawberry-Rhubarb Pie with Gingersnap Crust
Don’t worry this is the original pie recipe, and if you use fresh fruit your results will be much better. 

 Crust

25-30 Gingersnaps
¼ c. sugar
¼ c. flour
¼ c. butter, melted

Filling

1 c. slice rhubarb (about ¼” thick)
1 pint strawberries, sliced
½ c. sugar
½ tsp. cardamom
¼ tsp. cinnamon
¼ tsp. nutmeg
2 Tb flour


Preheat oven to 350°.  Pulse the gingersnaps in a food processor to begin to crush.  Add sugar and flour, continue pulsing. Drizzle in melted butter until the crumbs have all changed to a darker color (moistened from the butter). 

Press the crumbs firmly into a pie plate, spreading evenly.  Bake for 15 minutes, or until the crust is fragrant and crumbs are no longer loose.  Cool crust slightly.

While the crust bakes, combine rhubarb, strawberries and sugar in a saucepan over medium heat.  Cook for about 5 minutes to release some moisture.  Add spices and remove from heat.  Toss filling with the 2 Tablespoons of flour.  Pour mixture into crust and bake for 35-40 minutes.  Let pie cool to set about 2 hours. 


Friday, December 16, 2011

Almost Almond Macaroons

We have come to the end of the cookie testing, and I am glad that I did it. I had a few hits and a few more misses. And as per usual, I have left the most difficult cookie recipe to try for this weekend. So if you hear me cursing and throwing ingredients around the kitchen, don’t be alarmed.

In hindsight I wish that I had really cooked the s**t out of some new cookie recipes, but alas my time was taken away from me. So I apologize for only giving you a couple of usable cookie recipes and only a few posts this month as well. I feel as though I have really dropped the ball on this whole sharing recipes for the holiday’s thing.
This week I made almond macaroons after seeing an old episode of Baking with Julia. The cookies seemed so simple to make, and are a favorite Italian bakery treat for Joe and I. I figured, why not. Instead of using the recipe from that episode (mostly because it called for 8 oz. of almond paste and I could only find a tube of 7oz.) I instead used the recipe inside the box. And typically, this method works out just fine. Well, except for the Tollhouse chocolate chip recipe on the bag, I find that it is a little too much butter if you don’t refrigerate the dough before baking, but that’s just me.
Anyways, this recipe gives you very almond-y flavored cookies which is wonderful, but they are a bit too chewy for me. I feel like a dog eating peanut butter when I chomp into one of the cookies. Aside from that, the cookies are good, and simple to make.

I think I have narrowed down my Christmas cookie selection to the following:
Peanut Butter Chocolate Chip Cookies
White Chocolate Cranberry Oatmeal Cookies
Jam Filled Cookies
Chocolate Mint Cookies (previous post)
Italian Tri-Colore Cookies
And if the mood strikes me, maybe something else.
I’ll let you know next week which ones worked out the best!

Almond Macaroons7oz. Almond paste
½ c sugar
Pinch of salt
¼ c egg whites


Preheat oven to 350°. Line two baking sheets with parchment paper.

Grate the almond paste and place in the bowl of a stand mixer. Add the sugar and salt and mix on medium speed to thoroughly combine. Add in egg whites and mix until the dough everything is well incorporated, scraping down the sides of the bowl several times (about 5-7 minutes).

Scoop cookie dough into a pastry bag, or releasable bag and snip off one corner. Pipe the dough in a snail like formation onto the cookie sheet.

Next dampen a cotton kitchen towel and gently smack the cookies to remove the lines from piping. Bake for about 12 minutes or until the edges are a light golden brown.

Let cool on the baking sheet. To remove the cookies from the paper, lift the paper, wet your fingers, and moisten the paper directly underneath the cookie. Then peel the cookie from the paper. This will help get the cookie cleanly off of the paper. Store in an airtight container. Makes about 2 dozen.

Wednesday, November 16, 2011

Another Look at Cookies

Again, let me apologize for not sharing a good recipe with you last week.  I have a better one this week – I promise. 
So toward the end of college I was working for a cookbook author, preparing to work again with the Smithsonian Folklife Festival’s Foodways section, and waitressing in a bar.  That meant I was thinking about and dealing with food pretty much continually.  I didn’t eat too much food as I was incredibly busy, subsisting off of single pop tarts and hamburger halves through thesis writing and graduation.  (I realized this was a bad idea when I grabbed a hamburger from the bar I worked at, ran to pick up graduation tickets, said hello to a friend’s family, answered two telephone calls from my own family and began choking on said hamburger in front of my former advisor; I thought I should really move on to something that required less chewing.)
Anyways, around this time I started tinkering with my own recipes.  I made a pretty awesome strawberry rhubarb pie and some wonderful cookies.  I wrote down the recipe for the pie, but neglected to take my cookie recipe to paper.  Thus, I forgot the recipe.  But, I remember what those cookies tasted like. 

Have you ever eaten something but wanted it to be a little more spectacular?  Like, wow this chocolate chip cookie is good, but what if it had peanut butter in it too?  That’s the way I felt about the Archway chocolate cookies you find in the grocery store.  I had bought them for a project my step-sister was doing for her special-ed classroom – Ice Cream sandwiches.  The Archway cookies are big, flat and easy to handle.  They offer a large area for spreading ice cream which is always a big deciding factor in making ice cream sandwiches.  The chocolate cookies are good, but they were missing something – mint.  Now, if you are not a fan of chocolate and mint I am sorry, you are missing out.
These cookies are a little temperamental, they are superb when cooked exactly right and kind of duds when baked a little too long.  Although as long as you use a timer when baking, you should be fine.  (I don’t use a timer, and this comes back to bite me in the butt every so often).  These cookies store well in an air-tight container making them perfect for baking and sharing, but they also make a very handsome ice cream cookie sandwich.


Chocolate Mint Crinkles
as adapted from Bon Appétit Dec. 2000

2 sticks butter, softened
1 ¾ c sugar
2 eggs
¾ tsp peppermint extract
2 cups white whole wheat flour
1 c cocoa powder
1 tsp baking soda
½ tsp baking powder
½ tsp salt
Large Granulated decorating sugar


Preheat oven to 350°.  Line 4 baking sheets with parchment paper.  In the bowl of a stand mixer, cream butter and sugar together until light and fluffy.  Add the eggs and peppermint extract and mix to combine.

In a separate bowl, combine flour, cocoa powder, baking soda, baking powder and salt.  Add the dry ingredients to the butter mixture and mix until just combined.  Roll dough into 1 ½” balls and place on a cookie sheet spacing about 2” apart.  Press dough on the balls to flatten them to about ½” thickness. 

Sprinkle cookies with decorating sugar, and bake until the cookies are firm around the edges, but soft and crackled in the center – about 12 minutes.  Rotate pans if the cookies are baking unevenly.  Cool on trays for about 5 minutes and then move the parchment with cookies off of trays.  Allow to cool, and enjoy.

Thursday, November 3, 2011

Curious Cannolis

First, I need to apologize to Joe’s Nana.  (by the way it’s pronounced ‘Nah-Nah’) I fear that she would not approve of the recipe I am about to share with you here.  She takes her cannolis very seriously.  These qualify as being too fussy or new to meet her exacting cannoli standards, and for that I understand.  But I will push on anyways without her blessing and share this recipe anyways.

Oh wait, so you want to know more about how seriously Nana takes her cannolis? Alright, I will indulge you.  I once made cannolis for Joe’s grandparents when we went to visit around Halloween one year.  He said his grandfather liked cannolis, so I thought that would be an excellent surprise to bring along.  Well, that and it gave me an excuse to buy cannoli forms.  What are cannoli forms?  Oh they are just over priced pieces of pipe that you wrap cannoli dough around and then deep fry. 
I made sure to follow a traditional recipe for both the cannoli shells and the filling.  Joe advised me that I should keep the filling in a separate container and only fill them once we were about to eat dessert, otherwise the shells would get soggy. (I’m telling you, these people do not mess around!) 
I managed to keep everything intact through a Halloween party and a short flight – I typically carry food with me as a carry on – doesn’t everyone? 
When I announced what I brought for dessert, Joe’s grandfather was excited but Nana was hesitant.  She told me she needed to taste the cannoli cream before I could serve it.  I opened the ziplock bag and she stuck her finger right in and popped it in her mouth.  She closed her eyes and nodded – it would do.  I am sure she was being nice, but at least it passed.  And she told me she couldn’t stand it when they put in different things like cinnamon into the cream.  She went on to tell me that she would always insist on tasting the cannoli cream before purchasing any cannolis from a new bakery, and that she had told the proprietors no on more than one occasion.  So at least I had passed this test.

However delicious regular cannolis are, I thought I would try something a little different for Halloween this year and perhaps even throughout the Holidays.  Plus, I am super obsessed with pumpkin flavored things this year.  Below is the complete recipe for the cannolis, but if you can find cannoli shells at the store, or if you can buy empty shells from a bakery – do it.  It is not really worth the hassle of frying your own.  I thought that after one greasy form slipped into my pot of oil and sprayed the entire kitchen.  Save yourself the trouble – unless of course you want an excuse to run out and buy cannoli forms.

 Pumpkin Cannolis
As adapted from the recipe inside the cannoli form packaging.

For the Shells
1 ¾ c flour
½ tsp. salt
2 Tb sugar
1 egg
2 Tb butter, cold and cut into small pieces
About ¼ c sweet Marsala
1 egg white, slightly beaten

Vegetable oil for deep frying


For the Filling
2 c ricotta cheese
1 c canned pumpkin
¾ c powdered sugar
2 tsp vanilla
¼ tsp anise extract
½ tsp cinnamon
½ tsp nutmeg
¼ tsp all spice
1/3 c mini chocolate chips


For the Shells: Sift the flour, salt and sugar together into a large bowl.  Make a well in the center, add the egg and butter.  Slightly beat the egg, and then with a fork begin to moisten the flour working from the center outward.   Add Marsala one tablespoon at a time, working until the dough comes together (it will still be a bit dry).  Cover and let stand for 15 minutes at room temperature.

Roll out the dough to about 1/16” thick and cut into circles 3 ½” in diameter (or 2 ½” for smaller cannolis).  Then with the rolling pin, make the circles into ovals.  Heat oil in a heavy bottomed pot, so there is about 2 – 3” of oil for deep frying. 

Wrap the dough around the cannoli forms, dip your finger into the beaten egg white and wipe it where the dough overlaps each other t seal it.  Then turn out the edges of the dough around the form slightly.  Once the oil reaches 350° begin frying.  Fry each shell for about 1 or 2 minutes until golden brown, remove to a paper towel lined platter and let cool.  Once cool, slide form out of shell and wrap another piece of dough around it.  Repeat until all the shells are fried. 
 

For the Filling: Blend the ricotta in a food processor or blender until very smooth, add in pumpkin, sugar, vanilla, anise and spices and blend until well combined.  Add chocolate chips and stir to combine.  Place filling in a pastry bag, or a ziplock bag. 

When ready to serve, pipe filling into each shell, dust with powdered sugar and enjoy.

 Makes about 15-18 cannoli shells (with some extra filling).

Wednesday, August 10, 2011

If You're Going to Eat Chocolate...

I tried to swear off desserts recently. It lasted about 2 hours. I told myself (and Joe) that I wasn’t going to buy anymore ice cream. Actually I have said this numerous times this summer. But then I picked blueberries, so we needed some vanilla for those, and then I had a coupon, so I needed to use that. Do you see how really these things are out of my control?
Well, I finally did clear the freezer of ice cream and I told myself that now would be a good opportunity to go dessert free for a few weeks. But then we realized we had some leftover chocolates from Hawaii, and in a pinch I am ready to make dessert should it come to that. And it did.

I had bought the ingredients to make something chocolaty and delicious when Joe and I were watching our friends’ daughters for the evening. But we live less than a block away from miniature golf and ice cream so any at-home activities for that evening were trumped immediately by those two prospects. The weather threatened rain, and I thought baking would be a good babysitting time waster.
I like to be prepped with games, activities and ideas whenever babysitting. This is probably because I secretly still want to belong to the Babysitters’ Club. That, and the last time I watched the girls at my house we played with chocolate and it went very well. I think kids should be able to let loose when they are with a babysitter, plus if they are all wound up at the end of the evening they go back to their parents anyways. (Sorry Bess!)
The last time I watched the girls we made truffles. I make pretty good truffles and I promise to maybe one day divulge that recipe. When I began telling them about the steps and ingredients for the truffles, the eight year old told me “Oh yeah, my friends and I always say – if you’re going to have chocolate, it should really be Ghirardelli.” I heartily agreed.
As we got into the melting, rolling and forming I realized that this was going to turn into a giant mess. It looked like I took the six year old girl and dipped her in the bowls of chocolate. I also was unprepared for the amount of finger, hand and apparently arm licking of that melted chocolate which lead to an immediate sugar high. At one point the six year old was running circles in my kitchen screaming and licking chocolate off herself. Later she confessed to her mother that the truffles were good for her because they didn’t have any sugar in them – just chocolate and cream.
The truffles turned out fine, and we only ingested a small percentage of the total yield that afternoon. I was much better prepared this second time around to thwart any appendage dipping into melted chocolate while making brownies. But, as I said before mini golf and ice cream are powerful draws for two small girls.

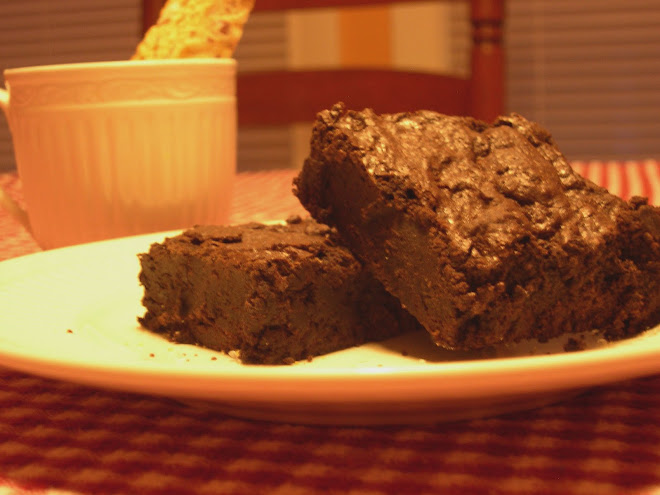
What I am getting at here, is that I had the ingredients for these brownies just lying around. And I really needed something to post this week – and I needed dessert. And as my friends always say; if you’re going to eat chocolate…

Chocolate Raspberry Brownies
as adapted from Sue Lawrence's Scottish Kitchen
These brownies are super rich and not at all healthy thus making them delicious. This recipe comes from a Scottish chef who made these brownies then placed them in a trifle – yowzer. The original recipe called for muscovado sugar but I can never find it here, so I have done some swapping and I think they turn out just as deeply flavored.

6 oz. good quality dark chocolate (60% Cacao is good)
3 oz. good quality Unsweetened chocolate
2 sticks plus 1 Tb unsalted butter
3 eggs
1 ¼ cups dark brown sugar, not hard packed
1 c. flour
1 tsp. baking powder
Pinch of salt
6 oz. fresh or frozen raspberries


Preheat your oven to 325°, lightly grease an 8” square pan.

In a small sauce pan melt the butter and chocolates together over medium heat, stirring constantly. Once melted and combined, allow to cool slightly.

In a large bowl, whisk together the eggs and sugar until glossy, about 2 minutes. Add melted chocolate to the bowl stirring to combine.

Next add the dry ingredients and fold to combine. Pour half of the batter into the prepared pan.

Sprinkle evenly with raspberries and pour the remaining batter over top. Bake for about 45 minutes or until the brownies have set and a toothpick comes out clean.

Let brownies cool and serve.


Wednesday, June 29, 2011

Seductive Strawberries

I have been trying to concentrate and think of a good story or something very witty to write for you this week, but in the immortal words of Johnny in Surf Ninjas “I’ve got nothing.”
I did go strawberry picking on Monday, and then proceeded to eat almost 2 full quarts in 2 days, so my stomach is punishing me for it.  But I couldn’t help it!  The strawberries were so good.  Perfectly ripe, juicy, sweet and in my refrigerator.  I was probably the only person this spring who didn’t mind all the rain we were getting.  The combination of cool rainy days and then warm sun filled ones make for some spectacular strawberries. 
Joe was once again happy that he didn’t have to accompany me on this agricultural adventure.  And I was glad that my raincloud of practicality was not following me around, it allowed me to pick almost 12 pounds of strawberries and an additional 2 pounds of fresh peas.  When I came home I could hardly wait to start eating the berries, but I managed to contain myself until after dinner. 

The combination of sliced strawberries, still warm from the sun, that are so ripe red juice coats your fingers, on top of cold dairy products is unspeakably wonderful.  So if you can, pick a few (or more) quarts - I highly recommend it.  Go on a day after rain, but while it’s sunny.  You will be amazed at the superiority of these berries over anything you could ever get in a supermarket. 
Well, I don’t have a strawberry recipe for you this week.  Sorry.  I did make a rhubarb cake this weekend, and it’s pretty delicious but I apologize for not having any tantalizing pictures of strawberries.  I’ve eaten (or frozen) them all.
Rhubarb Cake
While this bakes, it makes the whole house smell exactly the way freshly made cake should smell.  It is what candles and air fresheners try to achieve.  The cake itself is dense and moist, with a large crumb.  It works very well with mounds of sliced strawberries over it.

5 cups rhubarb, cut fairly small
½ cup butter, softened
1 ¼ cups sugar
3 eggs
1 tsp. vanilla
1 2/3 cups white whole wheat flour
2 tsp. baking powder
Pinch of salt
2/3 cup chopped hazelnuts

Heat the oven to 400°.  Grease a 10” spring form pan and set aside. 

Mix the flour, baking powder and salt together in a small bowl.
Cream together the butter and sugar until light and smooth, about 5 minutes.  Beat in the eggs one at a time, and then mix in the vanilla.  Gradually add the flour mixture and stir until just combined.  Fold in the rhubarb.  The batter will be very stiff, almost like cookie dough.
Press the batter evenly into the spring form pan, and smooth the top.  Sprinkle with the chopped hazelnuts. 

Bake for 35-45 minutes, or until the cake is set and it has pulled away from the sides of the pan.  If the cake is browning too quickly, cover loosely with aluminum foil midway through.

Allow to cool, then remove the band from the pan, and slice and serve. Preferably with super ripe sliced strawberries.