Showing posts with label Chocolate. Show all posts

Wednesday, November 16, 2011

Another Look at Cookies

Again, let me apologize for not sharing a good recipe with you last week.  I have a better one this week – I promise. 
So toward the end of college I was working for a cookbook author, preparing to work again with the Smithsonian Folklife Festival’s Foodways section, and waitressing in a bar.  That meant I was thinking about and dealing with food pretty much continually.  I didn’t eat too much food as I was incredibly busy, subsisting off of single pop tarts and hamburger halves through thesis writing and graduation.  (I realized this was a bad idea when I grabbed a hamburger from the bar I worked at, ran to pick up graduation tickets, said hello to a friend’s family, answered two telephone calls from my own family and began choking on said hamburger in front of my former advisor; I thought I should really move on to something that required less chewing.)
Anyways, around this time I started tinkering with my own recipes.  I made a pretty awesome strawberry rhubarb pie and some wonderful cookies.  I wrote down the recipe for the pie, but neglected to take my cookie recipe to paper.  Thus, I forgot the recipe.  But, I remember what those cookies tasted like. 

Have you ever eaten something but wanted it to be a little more spectacular?  Like, wow this chocolate chip cookie is good, but what if it had peanut butter in it too?  That’s the way I felt about the Archway chocolate cookies you find in the grocery store.  I had bought them for a project my step-sister was doing for her special-ed classroom – Ice Cream sandwiches.  The Archway cookies are big, flat and easy to handle.  They offer a large area for spreading ice cream which is always a big deciding factor in making ice cream sandwiches.  The chocolate cookies are good, but they were missing something – mint.  Now, if you are not a fan of chocolate and mint I am sorry, you are missing out.
These cookies are a little temperamental, they are superb when cooked exactly right and kind of duds when baked a little too long.  Although as long as you use a timer when baking, you should be fine.  (I don’t use a timer, and this comes back to bite me in the butt every so often).  These cookies store well in an air-tight container making them perfect for baking and sharing, but they also make a very handsome ice cream cookie sandwich.


Chocolate Mint Crinkles
as adapted from Bon Appétit Dec. 2000

2 sticks butter, softened
1 ¾ c sugar
2 eggs
¾ tsp peppermint extract
2 cups white whole wheat flour
1 c cocoa powder
1 tsp baking soda
½ tsp baking powder
½ tsp salt
Large Granulated decorating sugar


Preheat oven to 350°.  Line 4 baking sheets with parchment paper.  In the bowl of a stand mixer, cream butter and sugar together until light and fluffy.  Add the eggs and peppermint extract and mix to combine.

In a separate bowl, combine flour, cocoa powder, baking soda, baking powder and salt.  Add the dry ingredients to the butter mixture and mix until just combined.  Roll dough into 1 ½” balls and place on a cookie sheet spacing about 2” apart.  Press dough on the balls to flatten them to about ½” thickness. 

Sprinkle cookies with decorating sugar, and bake until the cookies are firm around the edges, but soft and crackled in the center – about 12 minutes.  Rotate pans if the cookies are baking unevenly.  Cool on trays for about 5 minutes and then move the parchment with cookies off of trays.  Allow to cool, and enjoy.

Wednesday, November 9, 2011

Christmas Cookies Part I

Alright here is my first installment of trying out cookie recipes for the Holidays and sharing them with you.  This week was Chocolate Pistachio Biscotti from an old Food & Wine recipe.  It looked quite delicious and biscotti keep very well so I thought I would give it a shot.
I don’t know about you, but I have binders (yes that’s plural) filled with torn out pages from magazines and handwritten recipes I scribbled down on something random.  Hello, torn piece of cardboard or back of “To Do List” from 2003.  My first binder is very well organized, with tabs distinguishing poultry from appetizers from desserts.  However, that binder got full real fast.  I also have a special purple binder emblazoned with Jewel (the singer) stickers that I brought with me to college.  This has in it my own recipes and other special ones, I know exactly which recipes are where in there and how each grease stain and food spot got onto the pages.  I love that purple binder (and no, not just because it has Jewel stickers all over it). 
The third binder is a bit more haphazard.  It’s kind of dangerous actually.  When I open it I have to be careful the recipes don’t take out their vengeance on me and cut me with a million paper cuts.  They are so poorly thrown together, some not even hole-punched (gasp!) that I am sure they feel their very nature has been compromised.  I am always hesitant to reach for that binder because I know it will take me an hour to go through it and find the recipe I want.  Seeing that binder reminds me why I should never take up scrapbooking. 
Perhaps if I have a snow day and some tabs and a hole-punch I can make an honest binder out of it.  Until that day comes, though, I will continue to add torn pages from magazines to the top of my book shelf and neglect them with all the others. 
Luckily for you though, this recipe came from the previous well-organized binder.  But I never had a chance to make it before now.  And the verdict is – it’s not really worth it to make these biscotti.  I know right!  What a letdown.  I had high hopes for these – pistachios, chocolate, almond extract, more chocolate – what could be bad about these.  It turns out that second addition of chocolate just doesn’t work.  Since biscotti get baked twice, they tend to be crisp and sturdy.  These took a little longer to cook then I prefer drying out parts but not the whole thing.  They were also very delicate to handle and tended to crumble since I had to move them around so frequently during the baking process. 
They taste fine, and they are pretty neat to look at but they kind of leave me with a ‘so what?’ feeling.  I figure that when trying to make cookies to encourage your neighbor to snow blow your walk way throughout the entire winter – you had better make some pretty spectacular cookies.  These were not snow blower approved.   If you would like to try them out for yourself, the link to the recipe is here.  So because of this, I do not have recipe per se to share with you today.  However, I am on the prowl for a scrumptious cookie and hopefully I can share a recipe with you next week!

In the Jamie v. Cookies battle so far:

Christmas Cookies – 0
Jamie - 1

Thursday, November 3, 2011

Curious Cannolis

First, I need to apologize to Joe’s Nana.  (by the way it’s pronounced ‘Nah-Nah’) I fear that she would not approve of the recipe I am about to share with you here.  She takes her cannolis very seriously.  These qualify as being too fussy or new to meet her exacting cannoli standards, and for that I understand.  But I will push on anyways without her blessing and share this recipe anyways.

Oh wait, so you want to know more about how seriously Nana takes her cannolis? Alright, I will indulge you.  I once made cannolis for Joe’s grandparents when we went to visit around Halloween one year.  He said his grandfather liked cannolis, so I thought that would be an excellent surprise to bring along.  Well, that and it gave me an excuse to buy cannoli forms.  What are cannoli forms?  Oh they are just over priced pieces of pipe that you wrap cannoli dough around and then deep fry. 
I made sure to follow a traditional recipe for both the cannoli shells and the filling.  Joe advised me that I should keep the filling in a separate container and only fill them once we were about to eat dessert, otherwise the shells would get soggy. (I’m telling you, these people do not mess around!) 
I managed to keep everything intact through a Halloween party and a short flight – I typically carry food with me as a carry on – doesn’t everyone? 
When I announced what I brought for dessert, Joe’s grandfather was excited but Nana was hesitant.  She told me she needed to taste the cannoli cream before I could serve it.  I opened the ziplock bag and she stuck her finger right in and popped it in her mouth.  She closed her eyes and nodded – it would do.  I am sure she was being nice, but at least it passed.  And she told me she couldn’t stand it when they put in different things like cinnamon into the cream.  She went on to tell me that she would always insist on tasting the cannoli cream before purchasing any cannolis from a new bakery, and that she had told the proprietors no on more than one occasion.  So at least I had passed this test.

However delicious regular cannolis are, I thought I would try something a little different for Halloween this year and perhaps even throughout the Holidays.  Plus, I am super obsessed with pumpkin flavored things this year.  Below is the complete recipe for the cannolis, but if you can find cannoli shells at the store, or if you can buy empty shells from a bakery – do it.  It is not really worth the hassle of frying your own.  I thought that after one greasy form slipped into my pot of oil and sprayed the entire kitchen.  Save yourself the trouble – unless of course you want an excuse to run out and buy cannoli forms.

 Pumpkin Cannolis
As adapted from the recipe inside the cannoli form packaging.

For the Shells
1 ¾ c flour
½ tsp. salt
2 Tb sugar
1 egg
2 Tb butter, cold and cut into small pieces
About ¼ c sweet Marsala
1 egg white, slightly beaten

Vegetable oil for deep frying


For the Filling
2 c ricotta cheese
1 c canned pumpkin
¾ c powdered sugar
2 tsp vanilla
¼ tsp anise extract
½ tsp cinnamon
½ tsp nutmeg
¼ tsp all spice
1/3 c mini chocolate chips


For the Shells: Sift the flour, salt and sugar together into a large bowl.  Make a well in the center, add the egg and butter.  Slightly beat the egg, and then with a fork begin to moisten the flour working from the center outward.   Add Marsala one tablespoon at a time, working until the dough comes together (it will still be a bit dry).  Cover and let stand for 15 minutes at room temperature.

Roll out the dough to about 1/16” thick and cut into circles 3 ½” in diameter (or 2 ½” for smaller cannolis).  Then with the rolling pin, make the circles into ovals.  Heat oil in a heavy bottomed pot, so there is about 2 – 3” of oil for deep frying. 

Wrap the dough around the cannoli forms, dip your finger into the beaten egg white and wipe it where the dough overlaps each other t seal it.  Then turn out the edges of the dough around the form slightly.  Once the oil reaches 350° begin frying.  Fry each shell for about 1 or 2 minutes until golden brown, remove to a paper towel lined platter and let cool.  Once cool, slide form out of shell and wrap another piece of dough around it.  Repeat until all the shells are fried. 
 

For the Filling: Blend the ricotta in a food processor or blender until very smooth, add in pumpkin, sugar, vanilla, anise and spices and blend until well combined.  Add chocolate chips and stir to combine.  Place filling in a pastry bag, or a ziplock bag. 

When ready to serve, pipe filling into each shell, dust with powdered sugar and enjoy.

 Makes about 15-18 cannoli shells (with some extra filling).

Wednesday, August 10, 2011

If You're Going to Eat Chocolate...

I tried to swear off desserts recently. It lasted about 2 hours. I told myself (and Joe) that I wasn’t going to buy anymore ice cream. Actually I have said this numerous times this summer. But then I picked blueberries, so we needed some vanilla for those, and then I had a coupon, so I needed to use that. Do you see how really these things are out of my control?
Well, I finally did clear the freezer of ice cream and I told myself that now would be a good opportunity to go dessert free for a few weeks. But then we realized we had some leftover chocolates from Hawaii, and in a pinch I am ready to make dessert should it come to that. And it did.

I had bought the ingredients to make something chocolaty and delicious when Joe and I were watching our friends’ daughters for the evening. But we live less than a block away from miniature golf and ice cream so any at-home activities for that evening were trumped immediately by those two prospects. The weather threatened rain, and I thought baking would be a good babysitting time waster.
I like to be prepped with games, activities and ideas whenever babysitting. This is probably because I secretly still want to belong to the Babysitters’ Club. That, and the last time I watched the girls at my house we played with chocolate and it went very well. I think kids should be able to let loose when they are with a babysitter, plus if they are all wound up at the end of the evening they go back to their parents anyways. (Sorry Bess!)
The last time I watched the girls we made truffles. I make pretty good truffles and I promise to maybe one day divulge that recipe. When I began telling them about the steps and ingredients for the truffles, the eight year old told me “Oh yeah, my friends and I always say – if you’re going to have chocolate, it should really be Ghirardelli.” I heartily agreed.
As we got into the melting, rolling and forming I realized that this was going to turn into a giant mess. It looked like I took the six year old girl and dipped her in the bowls of chocolate. I also was unprepared for the amount of finger, hand and apparently arm licking of that melted chocolate which lead to an immediate sugar high. At one point the six year old was running circles in my kitchen screaming and licking chocolate off herself. Later she confessed to her mother that the truffles were good for her because they didn’t have any sugar in them – just chocolate and cream.
The truffles turned out fine, and we only ingested a small percentage of the total yield that afternoon. I was much better prepared this second time around to thwart any appendage dipping into melted chocolate while making brownies. But, as I said before mini golf and ice cream are powerful draws for two small girls.

What I am getting at here, is that I had the ingredients for these brownies just lying around. And I really needed something to post this week – and I needed dessert. And as my friends always say; if you’re going to eat chocolate…

Chocolate Raspberry Brownies
as adapted from Sue Lawrence's Scottish Kitchen
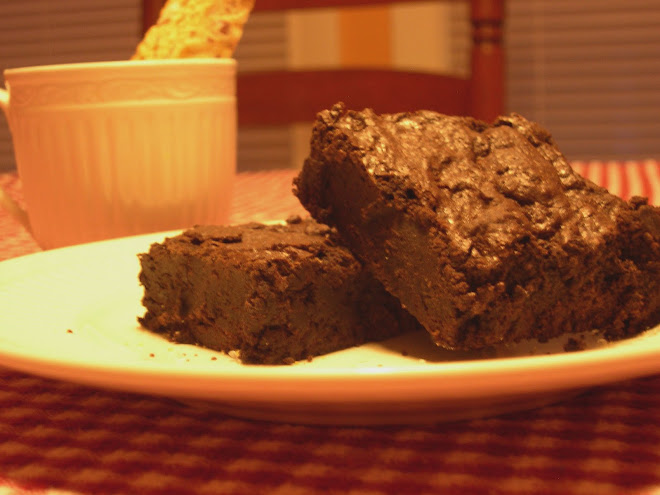
These brownies are super rich and not at all healthy thus making them delicious. This recipe comes from a Scottish chef who made these brownies then placed them in a trifle – yowzer. The original recipe called for muscovado sugar but I can never find it here, so I have done some swapping and I think they turn out just as deeply flavored.

6 oz. good quality dark chocolate (60% Cacao is good)
3 oz. good quality Unsweetened chocolate
2 sticks plus 1 Tb unsalted butter
3 eggs
1 ¼ cups dark brown sugar, not hard packed
1 c. flour
1 tsp. baking powder
Pinch of salt
6 oz. fresh or frozen raspberries


Preheat your oven to 325°, lightly grease an 8” square pan.

In a small sauce pan melt the butter and chocolates together over medium heat, stirring constantly. Once melted and combined, allow to cool slightly.

In a large bowl, whisk together the eggs and sugar until glossy, about 2 minutes. Add melted chocolate to the bowl stirring to combine.

Next add the dry ingredients and fold to combine. Pour half of the batter into the prepared pan.

Sprinkle evenly with raspberries and pour the remaining batter over top. Bake for about 45 minutes or until the brownies have set and a toothpick comes out clean.

Let brownies cool and serve.


Wednesday, April 20, 2011

Cuckoo for Coconut

Well, actually I’m not really that crazy about coconut. Fresh coconut – yes, coconut curry – yes, coconut lemongrass soup – double yes. But the shredded sweetened stuff has never really been a favorite of mine.
Personally, the Girl Scout cookies with the coconut are the worst ones those little girls are hawking. This, of course means that they are in fact, Joe’s favorites. So if we ever come across a group of small girls pushing boxes of temptations upon us, he will always buy those coconut ones. Really it’s not that bad, because it will be one less cookie for me to eat in the house. Or maybe that is bad! Who wants to have cookies laying around that you hate? It’s an inner struggle come girl scout cookie time –do I try (once again) those coconut cookies, only to spit them out in disgust, or do I walk past them with a squinty eyed glare as they taunt me with (in a sing-songy voice) ‘we are cookies, and you don’t like us!’

Anyways, coconut in desserts has not been a favorite of mine. Typically, I always associate Easter and spring with coconut. As far as I know there are no religious or pagan reasons behind coconut adorning desserts and breakfast goodies on Easter Sunday. Nevertheless, we had at least once, a bunny shaped cake with coconut on top of the icing to look like fur. And in theory this was magnificent, but I just couldn’t stand the coconut.
Now don’t worry, I am not going to spend the entire blog complaining about how much I dislike coconut. There is one recipe that I have found, with coconut that I actually enjoy. In fact, the recipe is mostly coconut.

When I was working with the cookbook author while in college, we were getting ready for Passover at her house. (I don’t know what the rules for Passover are, as far as having gentiles prepare food, but whatever.) One of the recipes we made was for coconut macaroons that she could keep on hand for sweets. These were the best macaroons I had ever had. I liked them so much that I went home and made a batch myself.
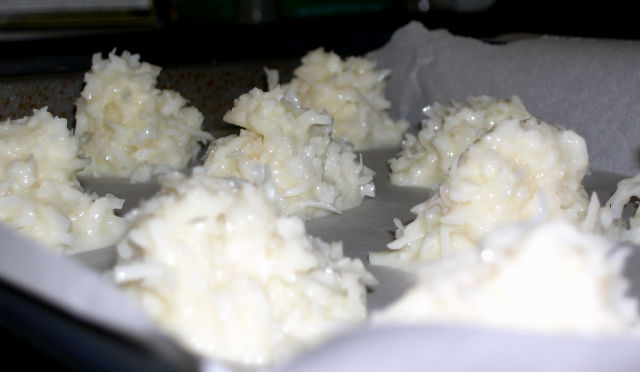
It’s been a while since I made them that first time, and I will admit that I had to scrap the first round of cookies this week. The second round came out better, and since these are gluten-free – they should be ok for Passover. Or, if you like coconut for Easter, you can dye the coconut in spring colors if you are daring. The consistency is very sticky, and these are very sweet. I highly recommend dipping them in melted chocolate, as it adds a little something to each bite.


Coconut Macaroons
I used 1 can of fat free sweetened condensed milk, and scraped out all of the milk with a spatula. My cookies had little pools of sweetened condensed milk around them, but I think if you punch two holes in the can and pour it out, it will give you the exact correct consistency – so no scraping!

14 oz. sweetened shredded coconut (2 small or 1 large bag)
1 can fat free sweetened condensed milk (opened with a ‘church-key”
1 egg white
1 tsp. vanilla
Pinch of salt
Chocolate, for dipping

Preheat oven to 350°. Line two cookie sheets with parchment paper.

Combine all the ingredients in a large bowl and stir to combine.

Drop mounded spoonful’s of mixture onto baking sheets, about ½” apart from one another. Bake for about 7-10 minutes, or until the coconut is starting to brown on the tops of the cookies. Let cookies cool.

Melt chocolate, and dip the bottoms of the cookies in the chocolate. Place back on parchment paper to dry.

Wednesday, February 9, 2011

Everyday's the Fourteenth

So as most of you are probably aware, Valentine’s Day is next week. This can be a hot button topic for some people. Guys and single girls typically, but I am generalizing so don’t get mad at me ok? Yes, I understand that it is a fabricated holiday to sell greeting cards and anything heart shaped but that being said I still kind of like it. And even when I was single I still kind of liked it. Don’t get me wrong, I mostly enjoyed being able to eat the entire box of chocolates that my parent’s sent by myself and not feel bad about it just because it was Valentine’s Day.
And if anyone of you out there are thinking, well we shouldn’t use this as an excuse to tell each other that we love one another, we should do that all time – Here! Here! But sometimes it’s nice to have a specific day where someone needs to be a little extra thoughtful, and a heart shaped box of chocolates (to share, I guess) never hurts either. And if I may brag a bit, Joe is pretty good at Valentine ’s Day.
I typically cook the meals we eat at home, but Joe can (and does) cook on occasion. And Valentine’s Day is when he pulls out all the stops. If I am home, I am forbidden from the kitchen and take serious delight in hearing swear words and mutterings emanate from the other room. I think this may be the path most taken for guys trying to impress someone; with a home cooked meal. When we were in California, Joe told me about going to a local Whole Foods and being followed by another man about 20 feet behind him. Every time Joe picked up something, and then walked away, this stranger went to the same spot and picked up the exact same item. Which seems like a good idea in theory – but I am assuming this person probably also (a) did not know for sure what Joe was making and (b) even if he did, he probably didn’t know how to make it. So hopefully, someone out there had a strange compilation of crab meat, mussels, lamb shanks and various other ingredients that should have been in three different dishes. I also asked Joe, and thought it would be funny, if Joe just started picking up the most random things he could find to throw the guy off, almost like a reverse supermarket sweep. But alas, Joe was less naughty than I would have been, and continued shopping for the things he actually needed.
I have no idea what is planned for this year (but by writing this ahead of time, I can almost guarantee something will be!) And I wanted to share with you all, a dessert that might be a nice accompaniment to a night in, or an after dinner treat. It should be made the day ahead, to sit in the fridge overnight. So this means forethought, and that is what most people like about Valentine’s Day. So upon presenting it to the one you love (or are with) mention causally that you made this the day before, I think it will go over well.

Flourless Chocolate Cake
As adapted from Maggie on Allrecipes.com
This is fairly simple but does require a bit of time. It is not a typical flourless chocolate cake, but rather seems more like a rich custard or pudding. It’s velvety and very rich, and relies heavily on very very good quality chocolate. So don’t skimp! And I also recommend using free-range organic eggs; they will impart a better flavor as well.

½ c water
¼ tsp. salt
¾ c sugar
18 oz. high quality bittersweet chocolate (Ghirardelli, Valrohna etc.)
1 c unsalted butter
6 eggs, at room temperature

Preheat oven to 300 degrees F (150 degrees C). Grease one 9 inch round spring form pan and set aside.

In a small saucepan over medium heat combine the water, salt and sugar. Stir until completely dissolved, about 3 minutes, and set aside.

Melt the chocolate in a glass bowl over simmering water in a saucepan (or in the microwave* – but be careful not to burn it!). Remove the bowl and allow to cool a bit.

Cut the butter into small cubes and stir the butter into the chocolate, a few pieces at a time. Mix in in the hot sugar-water. Slowly beat in the eggs, one at a time.

Pour the batter into the prepared pan. Place the round cake pan into a larger pan and fill the larger pan with boiling water halfway up the sides of the cake pan.

Bake cake in the water bath at 300 degrees F (150 degrees C) for 55-60 minutes. The center will still look wet, but the edges will have begun to pull away from the sides. Chill cake overnight in the pan. To unmold, dip the bottom of the cake pan in hot water for 10 seconds and invert onto a serving plate. Release the side of the pan and remove the bottom (off of the top, since the cake is inverted).

If you don’t have a spring-form pan, you can bake this cake in a regular cake pan. Follow all the same steps but you may also need to insert a knife at angle while the pan is upside down on the plate to release the bottom. Sprinkle with powdered sugar or decorate with fresh berries.

*to melt chocolate in the microwave, place the chocolate (in small pieces) into a microwave safe bowl. Heat on high for 20 seconds. Then remove and stir. At this point, it will seem like nothing happened. Repeat. Continue doing this until the chocolate begins to just melt, then reduce the time to 10 seconds. If the chocolate is mostly melted, stir hard, to try and melt the remaining bits, rather than microwaving again. If you do burn the chocolate, discard it and start again. Oh and air out the kitchen because it will stink!

Wednesday, April 21, 2010

Making Whoopie

Before moving to Maine, I guess I had heard about whoopie pies, but they did not leave a big impression on me. Once I got here though, they were everywhere. Restaurants of all shapes and sizes claim to make the best or biggest (I’m talking dinner plate size). But to tell you the truth, I never really felt the urge to eat one. They were always packed into tightly wrapped cellophane with their fillings pressed up against its edges. There were chocolate, peanut butter, strawberry, maple and the list goes on from there.

Until at work one day we celebrated a birthday. My coworker had specified that we were not to get her a cake, but some of us wanted to do something at least. I mean who could pass up the chance to take a 15 minute break to convene in the kitchen and chit chat. So despite her protests, a friend of mine offered to make whoopie pies for everyone. I was indifferent to that decision, but everyone else was on board, so who was I to poo poo such a Maine tradition.
I wish I had taken pictures of those whoopie pies, but alas, they were consumed far too fast. Each one was a perfect sand dollar sized sandwich of heaven. After my first few bites, I managed to stop shoving the whoopie pie in my face long enough to lean over to another coworker and ask “Do all whoopie pies taste like this?!”
“No.” She told me emphatically. Thank goodness I thought to myself, if they did I would no longer be able to resist them at restaurants, grocery stores and gas stations. I was also happy to know that I hadn’t been missing out all these months. But the ones my friend had put together were far superior to the average (I’m willing to go so far as to say ALL) whoopie pies.
I like the ‘special dark’ cocoa powder in this – I find that it gives chocolate desserts a deeper flavor, and not to mention the fact that the color is so intense. The batter for the cakes is unlike any batter I have made or seen before. It has an almost thick, sticky consistency, but bakes up dense. When I was talking to my friend she told me it’s similar to a thick pancake batter – which is completely accurate.

Despite the lopsided and misshapen examples I have here for you, these are very easy to prepare and don’t take a lot of time.
P.S. If any of you have tried any of the recipes I have shared here – please let me know how they have turned out! Leave comments on the post that corresponds to the recipe – and if something doesn’t work out as well, again please let me know. I want t make sure these recipes are perfect for you!!

Whoopie Pies by Mainer, Sharon Beaulieu

For cakes
* 2 cups all-purpose flour
* 1/2 cup Dutch-process cocoa powder
* 1 1/4 teaspoons baking soda
* 1 teaspoon salt
* 1 cup well-shaken buttermilk
* 1 teaspoon vanilla
* 1 stick (1/2 cup) unsalted butter, softened
* 1 cup packed brown sugar
* 1 large egg

For filling
* 1 stick (1/2 cup) unsalted butter, softened
* 1 1/4 cups confectioners sugar
* 2 cups marshmallow cream such as Marshmallow Fluff
* 1 teaspoon vanilla

Make cakes:
Preheat oven to 350°F.

Whisk together flour, cocoa, baking soda, and salt in a bowl until combined. Stir together buttermilk and vanilla in a small bowl.

Beat together butter and brown sugar in a large bowl at medium-high until pale and fluffy, about 3 minutes, add egg, beating until combined well. Reduce speed to low and alternately mix in flour mixture and buttermilk in batches, beginning and ending with flour, scraping down side of bowl occasionally, and mixing until smooth.

For Large Whoopie Pies: Spoon 1/4-cup mounds of batter about 2 inches apart onto 2 buttered large baking sheets.

For smaller Whoopie pies: Drop spoonfuls, onto large baking sheets 2 inches apart.

Bake in upper and lower thirds of oven, switching position of sheets halfway through baking, until tops are puffed and cakes spring back when touched, 11 to 13 minutes. Transfer with a metal spatula to a rack to cool completely.

Make filling:
Beat together butter, confectioner’s sugar, marshmallow, and vanilla in a bowl with electric mixer at medium speed until smooth, about 3 minutes.

Spoon filling onto the flat side of one cake, press the other flat side of another cake on top to push the filling out towards the edges. 

Enjoy!