Monday, October 15, 2012

Rockport Apple Weekend


 I had kind of lost the inspiration to post here for a while.  I felt that I had run out of fun stories, or anything meaningful to say.
 Perhaps that is slowly coming back.
 So instead I wanted to share with you a montage of photos taken by a friend of mine (Thank you Leila!) a few weekends ago.  When I saw all of these, I thought I had just participated in one of those super-posh food magazine weekends.  You know what I mean, when you look through food magazine articles about some fabulous get-together that super wealthy and exclusive people have all while trying to appear as casual as humanly possible.
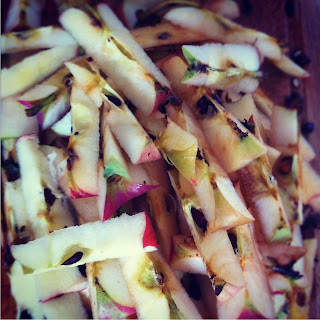
 I went to Rockport, Mass. to visit some friends, and while I was there, I put them to work.  We cut, cored and peeled 2 full pecks of apples, which in lay-speak is approximately a “sh*t-ton”, or so I was told.  We then canned those apples for apple pie filling.  2 pecks turned out to be far more than we needed, as I managed to make 12 cans (2 of which exploded and needed to be refrigerated and not stored) and 2 apple crisps.

 But the beauty of a rainy cool autumnal day when apple, cinnamon and sugar mingle together throughout a tiny apartment overlooking a sleepy fishing harbor reawakened something creative inside of me.  Well, that or the mixed drink we created using the leftover apple and lemon preserving juice.  Either way, perhaps I will make a reappearance here.


Wednesday, July 11, 2012

It's Hot Out - Let's Have Soup!

In between my freshman and sophomore years at college, one of my roommates invited some of us to go sailing in Casco Bay here in Maine.  Another roommate and I traveled up and we spent the next few days motoring around the bay in a sailboat under cloudy cold skies.  I should also say that both my roommate and I were intensely sea sick for that time as well.
Don’t get me wrong it was beautiful, but I was at that time unaccustomed to the fact that Maine can be 55° at midday during the summer.  It also was not very windy, which meant the “sailing” portion of our trip turned into using the diesel engine on the boat to slowly maneuver us around island (this engine was referred to as the ‘diesel donkey’).  Thus the seasickness I had was not of the “chumming for large sport fish” variety but a dull and constant nausea. 
Angry Lobster!
There were of course some wonderful experiences; stopping on an island and shell hunting, sleeping all together on the tiny galley table that pushed down to become a bed, and lastly stopping at a restaurant on the final day for some lobster bisque.  The lobster bisque was very tasty although I could only manage to swallow a few sips, again due to that lingering seasickness. 
Now, as I understand it lobster stew/bisque/chowder has basically 4 ingredients; broth, cream, butter, lobster.  And although this combination is very delicious, it is not the lightest meal to consume.  If the stew sits any longer than 30 seconds, the layer of butter separates to the top making a lovely orange shimmer along the surface of the bowl or pot. 
Since this summer has been decidedly un-Maine-like where it has actually been warm to hot even, the idea of consuming a large bowl of cream and butter didn’t sound that appetizing.  But, lobster prices are incredibly low right now, and Joe and I try to reserve tucking into whole steamed lobsters for when we have company, which lead me to thinking about lobster bisque.  So how should one go about making a lighter version of the traditional bisque? By adding vegetables of course! So the next time you feel like making soup during this incredibly hot summer, may I suggest a lovely Lobster Corn Chowder.

Lobster Corn Chowder
This recipe is really an amalgamation of recipes, but it is most closely related to the Williams Sonoma Lobster Corn Chowder

I had a bag of frozen lobster stock ready to go for this dish, but if you don’t I recommend using the one in the above recipe link.


2 1-1/4 pound lobsters
3 slices of bacon, diced
1 medium onion, diced
2 medium carrots, diced
1/4 c. white wine
4 cups lobster stock
1 lb. potatoes, diced (red skinned or fingerling)
3 ears fresh corn, shucked
2/3 c. heavy cream
3 scallions, sliced
10 cherry tomatoes, quartered (optional)
Fresh chives, chopped
Hot sauce, optional


In a large pot place 2 inches of water, heavily salted. Place the lobsters in, cover and steam for about 7 minutes, or until the lobsters are bright red.  Remove lobsters from pot and set aside to cool.

Next, cut the corn off of the cob, and reserve both the cobs and the kernels.

In a large stock pot over medium-high heat, sauté bacon to render the fat, add diced onion and continue to cook for another 5 minutes.  Add diced carrots and cook another 5 minutes.  Next add the white wine, and scrap off any brown bits on the bottom of the pan, simmer until the wine is mostly evaporated.  Add the lobster stock and corn cobs, bring to a boil.  Next add the potatoes, and the white part of the scallions, and cook for about 10 minutes.  Add the heavy cream, bring to a boil, then reduce to a simmer.  Toss in corn kernels.  Continue cooking for another 10 minutes. 

Pull lobster meat from lobsters – knuckle and claw meat can be left intact, but chop tail meat into bite sized pieces.  Add lobster meat to the chowder.

Just before serving add in the remaining scallion greens.  Ladle into bowls and add chives and tomato quarters.  A dash or three of hot sauce in each bowl is a great addition right before eating – it will enhance the creaminess!


Wednesday, May 16, 2012

Baking Biscuits

When my grandfather moved out of his home in Delaware after my grandmother passed away, my family was able to take whatever items they wanted before everything was donated to charity or sold.  I met my father at the train station in Wilmington in a rental van we would use to bring all my loot back to Washington D.C. 
My father and I had the run of the house for the day and we went through pretty much everything.  I was on the lower end of the priority list for taking things, so there wasn’t much left.  But when you are a college student who has just moved into an apartment the 60’s and 70’s décor, housewares, and furniture your grandfather owns is very exciting.  I chose with awe some of the golden colored wine glasses used only for special occasions – two sizes.  Which I later found out my grandmother had collected at gas stations as part of some kind of promotion in the early 60’s.  I nabbed the two twin beds for the new apartment, a turquoise Chinese tea set and some cookbooks.
I had just gotten into cooking, and so I did not understand the treasure trove of cooking references that my grandmother had collected over the years.  I figured I would grab some that looked interesting and then leave the rest.  I am sure I probably left behind a first edition of Mastering the Art of French Cooking.  What I now have in my possession is an early copy of the Better Homes and Gardens Cookbook, the one with the red checks and in 3 ring binder format as well as a first edition of the Physiology of Taste as translated by M.F.K. Fischer (this may actually be worth a little money).  But it is the Better Homes and Gardens Cookbook that I remembered fondly, and one that I use still for basic recipes. 
My grandmother studied home economics at Cornell.  She may have taught for a few years before having children and practicing home economy.  However, unlike where you think this story is going, my grandmother was not the “make it from scratch” home ec. teacher in June Cleaver attire.  She loved convenience foods.  A classic meal during the holidays or any family gathering was canned ham, canned pineapple, macaroni and cheese (this was just cooked elbow macaroni tossed with shredded cheese – no sauce, no gooey stringy cheese – I hated macaroni and cheese for a very long time) and canned crescent rolls.  Perhaps a salad or some frozen vegetables. 
So as you can see, I did not necessarily expect to find gastronomic treasures in my grandmother’s library of cookbooks – although I still wonder what I would have found had I known what to look for at the time.  However that Better Homes and Gardens cookbook did get a lot of play as a reference for cookies, roasting temperatures of meats and so on.  I prefer that cookbook with all its jewel-toned pictures and recipes for far more Jell-o molds than anyone could possibly need than any more recent edition.  And it is to this cookbook that I turn when I need recipes for biscuits or boiled frosting or everyday cake. 
Today I am going to tell you about the biscuits.  So many people are so ardent about biscuits that I was rather hesitant to try and make them.  What if they are not fluffy, what if they turn into hockey pucks, what if they just taste bad – all of these were very real fears that inhibited my biscuit making endeavors.  The trickiest part of it is those six words in each biscuit recipe – do not over work the dough.  How are you supposed to know!!  Where is that elusive fine line between not well mixed and over worked?  Will the dough change colors?  Will they become inedible?  Will the oven explode with terribly formed lumps of dough!  The horror!!
Biscuits are in fact not that scary.  The problem I realized is that most people don’t get tactile with the biscuits early on the in the process, and herein lies the secret to not overworked biscuits; use your hands!  After cutting in the butter, toss those two knives or pastry blender aside and rub the pieces of butter into the flour with your fingers.  This is (1) a lot less time consuming (2) a better way to determine the proper point at which to add the milk and (3) is the only sure-fire way to add love into your biscuits. 

Once you have the whole thing down, you will be able to whip up biscuits at the drop of a hat. 
Biscuits Supreme
As adapted from Better Homes and Gardens 1968

I have begun adding other ingredients and flavors to my biscuits.  Try adding any kind of fresh herb, or pesto to the biscuits.  Scallions and chives are wonderful for biscuits on top of chicken pot pie or other casseroles*. The green biscuits pictured above have a parsley pesto in them.

2 cups all-purpose flour
½ c. butter, cut into ¼” cubes
1 Tb and 1 tsp. baking powder
½ tsp. cream of tartar
½ tsp. salt
2/3 c. milk (anything but whole milk works fine), plus extra for brushing
2 Tb. Chopped herbs or pesto, optional

Preheat the oven to 450°.

Combine flour, baking powder, cream of tartar and salt in a large bowl.  Add butter and begin to cut in, when the butter pieces are reduced in size by half, begin using your hands.  Rub the pieces of butter quickly between your fingers to break them up, and toss the flour over the pieces.  Continue until the butter is mostly worked in, and the flour seems a bit heavier looking – there will still be a few larger clumps of butter, but that is ok. 

Next, make a well in the center of the flour, add in the milk and the herbs or pesto at this point if using.  To stir, use a fork and moving around the inside of the well, begin pulling in flour from all sides of the bowl.  Continue to stir with the fork until the dough is all wet and very difficult to stir. 

Move the dough out onto a floured board and knead a few times to combine the dough into a cohesive ball.  3-6 times should be all you need.  Roll the dough out to about 1” thick and cut into rounds.  Reshape the dough into a ball and roll out again, cutting new biscuits until there is only enough dough for one last biscuit – this one can be hand shaped. 

Place the biscuits on an ungreased baking sheet and brush with a little milk or melted butter.  Bake for 12-15 minutes, rotating mid-way through if necessary.  Serve warm from the oven!

*You can add these biscuits to anything you plan to place in the oven to bake.  For an easy chicken and biscuit recipe use the above biscuit dough and place onto precooked chicken, veggies and a lightly thickened gravy.  Bake uncovered for about 20 minutes or until the biscuits are brown on top and the chicken mixture is thick and bubbling.


Wednesday, April 25, 2012

Super Power Cookies

In college, my girlfriends and I looked for any opportunity to dress up and have a party.  When I say dress up, I’m not referring to nice clothes; no I am referring to costumes.  And in college this all equates to an excuse to drink and decorate your dorm room.  Just like Halloween but multiple times a year.  As with Halloween, the costumes are, ahem, not the most modest. 
Sophomore year, a friend of mine was taking a course on super heroes (I know, it seems ridiculous, but I took two classes that involved quilts).  She managed to convince her professor that she should get extra credit if she threw, and documented, a “Super Heroes” party.  He agreed.  My friends all went into crazy planning mode, with mix tapes, theme drinks, and decorations. 
At the time, I found a recipe online for “power cookies” and I figured this would be appropriate fodder for keeping super powers up.  Now, this was before I had really honed my skills in the baking department, and needless to say these cookies were not very tasty.  Although, if you put enough intoxicated college students in a room with cookies – even terrible cookies – they will get eaten.
Recently, I had been thinking about those cookies.  One, because a friend mentioned that in London it is totally acceptable to have fancy dress parties, akin to our Super Heroes party, and I thought it would be wonderful if all of us know at the very end of our 20’s were to do something like that.  Ridiculous, but wonderful. 

Second, I have seen lots of recipes and even ads for something called breakfast cookies.  In looking at the ingredients or nutritional value of said cookies, I would not consider them acceptable for breakfast. And I suppose that some of these cookies probably are better than a pop tart, I still wouldn’t want to each that much sugar to start my day. 
In going back to the original power cookie recipe, I made some changes and when I tested these cookies – they were actually pretty good.  I brought them to a regatta this weekend for the rower’s to eat, and although I didn’t see too many get consumed while I was there, I heard good reports regarding the overall flavor and texture.  These cookies would be a great way to start your day, or an excellent and protein filled snack; especially if you need to keep up your super powers.

Please excuse the blurriness of this image, I took it with my phone at the regatta, while the cookies were still in the ziplock bag.

Power Cookies
As adapted from Sara Sue on allrecipes.com

I highly recommend using dried beans rather than canned beans for this.  In the original recipe, I used canned beans, and the cookies then tasted like beans.  The dried beans also yielded less moisture, so I added unsweetened, spiced, applesauce.  If you can’t find that, just get the organic unsweetened kind and add spices to the batter.

1 c. dried cannellini beans, soaked overnight, and simmer for 2 hours until soft (should yield 2 cups beans)
½ c. granulated sugar
½ c. dark brown sugar, packed
1 tsp. vanilla
1 c. unsweetened applesauce
4 cups oats
½ tsp. baking powder
½ tsp. baking soda
¼ tsp. salt
½ c. pitted dates
½ c. shredded coconut
½ c. raisins

Preheat oven to 375°. 

In a food processor, grind the oats into coarse flour.  It is not necessary for it all to be powder, as some larger bits will add texture to the cookies.  Move the flour to a bowl and add the baking powder, baking soda and salt, stir to combine.

Next, place the beans in the food processor (don’t worry about cleaning it between uses), and process until they are smooth, like a thick hummus.  Move beans into the bowl of a stand mixer.  Add sugars, vanilla and applesauce and mix until well combined. 

Add the oat flour mixture to stand mixture and mix until just combined.  Next, pulse the dates in the food processor to chop them into smaller pieces, about the size of the raisins.  Add the dates and raisins to the dough and mix until incorporated. 

Line two baking sheets with parchment paper.  Scoop dough with a heaping table spoon and loosely shape into a ball.  Press the dough down slightly on the board, but not to flatten the cookies.  The cookies will not rise or flatten while baking, so there is no need to space them out very much.

Bake for 15-17 minutes, rotating half-way through, until golden on top.  Allow to cool and store in an airtight container.


Thursday, April 19, 2012

Best Bratwurst

Now that the weather has turned warm again, we can all spend a little more time outside.  If you are like me, then you want to combine being outside with eating and drinking.  Joe and I have developed a pretty good system of doing just that.  But when we take it on the road – that’s when things really get good.
Please let me explain.  I don’t mean that Joe and I are good at getting drunk in public (although…), I mean that we enjoy a long afternoon of eating a little, drinking a little and repeating.  We developed this while living in California.  There was a street festival in a little beach town that offered tickets to various restaurants at a discounted price.  For instance the Thai restaurant would sell you a spring roll for 2 tickets, and tickets were a dollar each.  The point was to wander around and sample food.  Joe and I just took it to the next level.  We would try a dish of something, then head in to a bar to try a drink of something.  Usually there were one to two drinks for every dish.  The whole event was called a “Stroll and Savor” but when you outpace the eating with imbibing it quickly becomes a “Stagger and Savor” which is what we affectionately call it now.
We do this still on nice evenings; walk to our bustling one block main street, sample various appetizers and happy hour specials, then stagger our way home.  How, you may ask, does this tie into being outside – well I like to sit outside while we are at restaurants.  So there.  Some people like to get sporty in the sun, I like to get full.
The first time I ever did something like a stagger and savor was in Germany at a wine festival.  There were booths of vendors giving away samples of wine and other vendors selling food.  After hitting two or 3 wine vendors, my friends and I would go to a food vendor and share something like a crepe or pastry. 
Where we decided not to share was at the Brat tent.  The traditional way to eat German sausage, was one sausage on a piece of rye bread with lots of onions, sauerkraut and mustard.  If you are lucky, like we were on this occasion, you will sit with Germans who ask you disparaging questions about America and American culture.  “No, not all women marry for money in America. Yes, I understand that all of our reality-dating shows are based off of that premise. No I cannot offer you any high-profile examples of for love marriages.  Yes, I suppose you are right; we are a pretty greedy lot.” 
But really, I would like to focus back on the food here.  This is super easy to prepare.  The hardest part will be in procuring the best ingredients.  It is best to enjoy this meal outside with plenty of cold beer or white wine.  And if you want to stagger around afterwards, please be my guest.

Beer Brats
As with most things in life – local is always better.  If you are fortunate enough to find local sausage, local bread, local sauerkraut and local mustard – do it! If not, try to get the best quality of all of them.  For instance the kosher sauerkraut in the refrigerated section of the grocery store is far better than the canned version.

4-6 bratwursts, uncooked
2 large yellow onions
1 large keg can of beer, or 2 bottles of beer (dark or medium lager is good)
4-6 slices of 100% rye bread – or dark whole grain loaf
Fresh sauerkraut
Strong whole grain mustard

Poke the sausages with the tip of a sharp knife several times; this will help prevent the sausages from exploding while you cook them.  Place them in a large saucepan.  Cut one onion in half, and then into slices, add to the sauce pan.  Next, cut the remaining onion in half and cut off top, but leave the root end intact.  Peel off the skin, and add the onion halves to the pot.  Cover with beer.

Bring to a boil, then reduce and simmer for about 10-12 minutes.  Check back frequently to make sure the beer doesn’t boil over. Meanwhile, prepare your grill for the sausages and the onion halves. 

Drain the sausages and onions from the beer.  Reserve the slice onion pieces for the sandwiches.  Grill over medium-high heat the sausages and onion halves until the sausages are golden.  Set out a platter with the rye bread, sauerkraut, boiled onions and mustard. 

To serve, each person makes and open-faced sandwich using the above ingredients; the more mustard and sauerkraut the better.

Wednesday, April 11, 2012

Pie Fail

I’ve been in a slump recently.  I must admit, these last few weeks have resulted in some epic fails in the kitchen. When that happens I tend to lose my temper and begin to throw stuff (equipment, food, etc.) around the kitchen.  I also then decide not to eat dinner but to have multiple glasses of wine instead.
Joe really enjoys it when that happens.

Case in point, I decided to use up some of the frozen fruit from last summer that is residing in my freezer.  I had a bunch of frozen strawberries, rhubarb, blueberries and raspberries.  So I figured that a strawberry-rhubarb pie would be very nice for dessert on Easter.  In fact, I have a lovely recipe for strawberry-rhubarb pie that I came up with a few years ago, that I wanted to try and make again. 
I got out my bags of frozen strawberries and rhubarb, added them to a sauce pan and began to cook them.  I thought this would help release some of the juices and extra water from being freezer-burned.  Nope, I got juice.  Just straight juice.  The strawberries completely disappeared and I had a saucepan full of liquid.  So I added some corn starch and let it bubble.  Then I added some fresh sliced strawberries.  Nothing.  I had a bright pink warm fruit soup.
So then I turned my attentions to the crust. It was perfect.  Figures. The one time I actually manage to crush the cookies fine enough and not add too much butter, my filling is what doesn’t turn out.
Not to be deterred, I decided to add egg yolks to the mixture hoping that when I baked it, it would turn into a custard. I poured the watery mess into my crust, shut the oven door and proceeded to pace around the kitchen for the next 45 minutes.  I opened the oven door approximately 40 times, which I am sure helped in the cooking process.
I reported back to Joe every time I peeked at the pie, “I think it’s gonna work!” Five minutes later, “It’s not going to work.” Another 2 minutes later, “I think it might just work!”  As you can see I was delightful on Easter Sunday. 

After the crust started to turn dark brown, I knew I needed to take the pie out and hope for the best.  It wasn’t jiggly, so I took that as a good sign.  But I fell asleep with a full belly of Easter dinner before we could try the pie.  Which I should have taken as a bad sign (for the pie that is).
The next day, after dinner I cut into my pretty pink mess and it slumped all over my pie server.  It failed.

But it tasted ok, and I have not gotten sick from it.  So I’ll take this as not quite an epic fail, just a normal sized fail.


Spiced Strawberry-Rhubarb Pie with Gingersnap Crust
Don’t worry this is the original pie recipe, and if you use fresh fruit your results will be much better. 

 Crust

25-30 Gingersnaps
¼ c. sugar
¼ c. flour
¼ c. butter, melted

Filling

1 c. slice rhubarb (about ¼” thick)
1 pint strawberries, sliced
½ c. sugar
½ tsp. cardamom
¼ tsp. cinnamon
¼ tsp. nutmeg
2 Tb flour


Preheat oven to 350°.  Pulse the gingersnaps in a food processor to begin to crush.  Add sugar and flour, continue pulsing. Drizzle in melted butter until the crumbs have all changed to a darker color (moistened from the butter). 

Press the crumbs firmly into a pie plate, spreading evenly.  Bake for 15 minutes, or until the crust is fragrant and crumbs are no longer loose.  Cool crust slightly.

While the crust bakes, combine rhubarb, strawberries and sugar in a saucepan over medium heat.  Cook for about 5 minutes to release some moisture.  Add spices and remove from heat.  Toss filling with the 2 Tablespoons of flour.  Pour mixture into crust and bake for 35-40 minutes.  Let pie cool to set about 2 hours. 


Wednesday, March 21, 2012

Gnocchi Guru

A friend of mine asked me if I could make gnocchi this past winter.  She told me that her daughter had gnocchi at an Italian restaurant in New Hersey and had really enjoyed it.  She was hesitant to buy the dehydrated shelf stable gnocchi at our local grocery store for fear that it would not measure up to her daughter’s expectations.
I have made gnocchi before, and each time with different results.  I have poured over many a recipe, website and magazine article.  I even got a secret family recipe from a college friend once for his grandmother’s gnocchi.  But due to the mixed results I seem to produce, I was a little hesitant to volunteer to be a gnocchi guru.
In looking over even more recipes, I found one that included some egg, and seemed to give some step by step instructions.  The gnocchi could be produced in a grand total of 2 hours, which is the max attention span time limit when making food with children.  There was enough “waiting” time in which small ones can leave the kitchen and run around before coming back and getting to work.
I find that the most difficult part in making gnocchi; is making it look good.  You can gently roll the little sections of dough off the back of a fork and create a little groove with dimples or you can simply stick your finger into each piece and flick it to create a small hallow space.  Thankfully, a friend volunteered to do that part, which is why these gnocchi look good.  I lose patience after about a dozen segments and the appearance of my gnocchi deteriorate greatly as the process wears on.
This was a wonderful project to take on with friends, children playmates and a little booze.  It make the tedious turn into a joyful experience, and I think that is exactly the way almost every meal should be approached.  The adults here were so enamored with the gnocchi that several very picky children expressed excitement in trying the end result. 
And for the little girl who was to compare the homemade gnocchi with her restaurant version – she told me it was even better than that dish she had in New Jersey.  Now that is a pretty wonderful compliment.


Homemade Gnocchi
As adapted from  Jenifer Mangione Vogt found on Food52.com

 1 ½ pounds russet potatoes, scrubbed and pricked all over with a fork
1 – 1 ¼ c flour
3 egg yolks (whites reserved)
Pinch of nutmeg
Large pinch of salt and pepper


Preheat the oven to 425°.  Roast the potatoes in their skins for about 45minutes to an hour (depending on their size).  They are done, when the skins appear to be a bit loose, and there are some darker brown spots on the potatoes.  Let the potatoes cool.

Peel the potatoes, removing the thicker tough layer just under the skin.  Grate the potatoes on the large holes of a box grater, and place in a large bowl.

Add in the egg yolks, flour, nutmeg, salt and pepper.  Begin to stir this together to fully incorporate everything.  Once the mixture becomes more stiff, use your hands to fully combine into a dough.  If the dough won’t stay together easily when pinched, add some of the egg whites. Or if the dough seems too wet and sticky add a bit more flour – keeping in mind you will need some flour to roll the gnocchi out.

Once the mixture is combined, divide it into 4 even pieces.  Roll these pieces out into a ½” diameter rope.  Cut the rope into ¾” pieces.  Roll each piece off the back of a fork, pressing slightly to make groves in the gnocchi, or simply press your finger into each piece, roll it gently towards you and then flick it away.

Place the gnocchi on a parchment lined baking sheet in a single layer, and freeze for about 15 minutes.

Meanwhile, bring a large pot of salted water to a boil.  Once the gnocchi are frozen, drop 7-10 in the pot at a time.  Once they float to the surface, skim them out, and place on a kitchen towel lined sheet.  Repeat with remaining gnocchi until all are cooked.  At this point, you can refreeze the gnocchi to save them for later, or you can add them to a sauce. 

We baked ours in a mixture of cheese, spinach and heavy cream for an easy gratin.