Wednesday, April 27, 2011

Stuffing To Impress

First, let me apologize for the potential dirtiness of this post’s title. I don’t mean it that way. Rather, I am talking about trying to impress people with your culinary skills. Stuffing one food item into another food item is always impressive. It can be a duck stuffed inside a chicken stuffed inside a turkey, or something simpler like stuffed artichokes or stuffed peppers. However you stuff it – it’s always impressive.
This is a good point to keep in mind especially when you really want some oohs and ahhs the next time you bring a dish to a potluck or host a party. And let’s be honest, sometimes you just want a few marveled guests to stare at you incredulously as they bite into the spectacular stuffed dish you produced.

The only problem to this end result is of course actually producing something spectacular. I find that when I need to bring something to a party I either, give myself zero time, have ten other things I am supposed to do prior to or during the party or I completely blank on something to make and wind up bringing something safe.
Well, my friends, here is a recipe to use in those kinds of situations! Granted, this does take a lot of time to do, but you can space it out over a few days which will ease the labor a bit. I have made these now approximately 3 times. Each time, specifically to impress people.

The first time was around my college graduation. I was making appetizers to bring over to an extended relative’s house for a mini graduation party. This might not seem too bad, except I had invited my new boyfriend’s parents over as well. Not only did I need to plan the party, and make the appetizers, but I had to seem effortless at it. I think I managed to pull it off, since only a select few people saw me choking on a burger while running from work, to pick up graduation tickets, to run home to shower to meet my parents to go for a drink at the cookbook author’s house and then to go to dinner with friends and family. Somewhere in between all those things, I managed to make these.
The next time I made these, was to impress now steady boyfriend’s extended family at Thanksgiving dinner across the country. Being in California, I felt I needed to be a bit snooty about presentation and the dish itself, so this worked out perfectly. I needn’t have worried about this as much, because after helping to make many of the side dishes for the night and after washing a very large pile of dishes, I proved my worth.
And then, most recently I made these this past weekend. Not to impress people, but just for something different and a little fancy. I know this doesn’t seem like a lot of recipe testing, but I promise the end result does not disappoint.

So as we approach the season for graduations, bridal showers and baby showers, keep this recipe in mind. A platter of these will impress even the most calloused of guests.

Middle Eastern Stuffed Grape Leaves
As adapted from The New American Cooking by Joan Nathan
I have not quite figured out the prefect ratio of filling to leaves. I recommend you buy two jars of leaves, or halve the amount of ingredients. But I like the filling, and tend to eat it as a side dish for other meals. The recipe is not difficult, but it takes a long time. So if you can, make the rice the evening before and then roll the leaves and steam them.

Makes about 50 grape leaves. Oh and by the way, this recipe happens to be vegan.

¾ c. olive oil
3 medium onions, diced (about 2 cups)
2 cups brown rice
½ c. pine nuts
1/3 c. dried currants
5 cups water
1 Tb. dried mint
2 Tb. dried dill
1 tsp. cinnamon
1 tsp. all spice
1 tsp. ground pepper
1 Tb. salt
2 tsp. sugar
2 16 oz. jars of grape leaves
2 ½ lemons

In a large pot, heat the olive oil over medium heat. Sauté the onions until translucent, about 5 minutes and add rice, stirring regularly about 10 minutes. Add 4 cups water and simmer, covered about 15 minutes, then add the pine nuts and currants, continue to simmer another 25 minutes, until rice is cooked and most of the water is absorbed. Add spices and sugar, stir to combine.

Cover the pot with a paper towel, and then replace the lid. Allow to cool, about 30 minutes, or overnight.

Drain and rinse leaves, carefully separating each leaf. Soak leaves in a bowl of cold water for about 5 minutes. Drain leaves, and sprinkle with lemon juice from one of the lemons. While separating the leaves, keep aside any torn leaves. Use these to line the bottom of a large heavy bottomed pot, with the dull side of the leaves facing up.

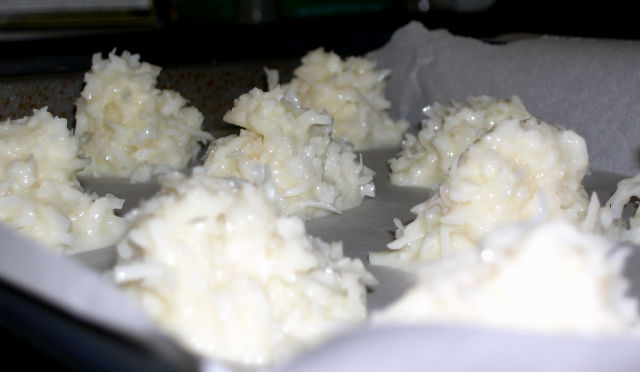
To stuff a grape leaf, place it dull side up on your work surface with the stem closest to you. Spoon some of the rice mixture (about 1 tsp, or less depending on the size of the leaf) into the bottom third, center of the leaf.

Fold up the stem side of the leaf over the rice, then fold each side of the leaf in towards the center over the rice mixture. While holding these in place on the rice, gently roll the leaf away from you. Place the bundle seam side down into the pan. As you continue to roll the leaves, place them snugly next to each other, until one layer is complete. Then place new leaves in a second layer alternating from the bottom layer (like bricks). Sprinkle with the juice of one lemon. Add in the remaining 1 cup of water, and use a few of the remaining leaves to cover the rolled ones. Place a small plate on top to weigh them all down.

Cover the pot with its lid, and simmer over medium-low heat for 30 minutes. Allow to cool in pot until ready to serve. When ready to serve, move grape leaves to a platter and sprinkle with juice of ½ a lemon.

Wednesday, April 20, 2011

Cuckoo for Coconut

Well, actually I’m not really that crazy about coconut. Fresh coconut – yes, coconut curry – yes, coconut lemongrass soup – double yes. But the shredded sweetened stuff has never really been a favorite of mine.
Personally, the Girl Scout cookies with the coconut are the worst ones those little girls are hawking. This, of course means that they are in fact, Joe’s favorites. So if we ever come across a group of small girls pushing boxes of temptations upon us, he will always buy those coconut ones. Really it’s not that bad, because it will be one less cookie for me to eat in the house. Or maybe that is bad! Who wants to have cookies laying around that you hate? It’s an inner struggle come girl scout cookie time –do I try (once again) those coconut cookies, only to spit them out in disgust, or do I walk past them with a squinty eyed glare as they taunt me with (in a sing-songy voice) ‘we are cookies, and you don’t like us!’

Anyways, coconut in desserts has not been a favorite of mine. Typically, I always associate Easter and spring with coconut. As far as I know there are no religious or pagan reasons behind coconut adorning desserts and breakfast goodies on Easter Sunday. Nevertheless, we had at least once, a bunny shaped cake with coconut on top of the icing to look like fur. And in theory this was magnificent, but I just couldn’t stand the coconut.
Now don’t worry, I am not going to spend the entire blog complaining about how much I dislike coconut. There is one recipe that I have found, with coconut that I actually enjoy. In fact, the recipe is mostly coconut.

When I was working with the cookbook author while in college, we were getting ready for Passover at her house. (I don’t know what the rules for Passover are, as far as having gentiles prepare food, but whatever.) One of the recipes we made was for coconut macaroons that she could keep on hand for sweets. These were the best macaroons I had ever had. I liked them so much that I went home and made a batch myself.
It’s been a while since I made them that first time, and I will admit that I had to scrap the first round of cookies this week. The second round came out better, and since these are gluten-free – they should be ok for Passover. Or, if you like coconut for Easter, you can dye the coconut in spring colors if you are daring. The consistency is very sticky, and these are very sweet. I highly recommend dipping them in melted chocolate, as it adds a little something to each bite.


Coconut Macaroons
I used 1 can of fat free sweetened condensed milk, and scraped out all of the milk with a spatula. My cookies had little pools of sweetened condensed milk around them, but I think if you punch two holes in the can and pour it out, it will give you the exact correct consistency – so no scraping!

14 oz. sweetened shredded coconut (2 small or 1 large bag)
1 can fat free sweetened condensed milk (opened with a ‘church-key”
1 egg white
1 tsp. vanilla
Pinch of salt
Chocolate, for dipping

Preheat oven to 350°. Line two cookie sheets with parchment paper.

Combine all the ingredients in a large bowl and stir to combine.

Drop mounded spoonful’s of mixture onto baking sheets, about ½” apart from one another. Bake for about 7-10 minutes, or until the coconut is starting to brown on the tops of the cookies. Let cookies cool.

Melt chocolate, and dip the bottoms of the cookies in the chocolate. Place back on parchment paper to dry.

Wednesday, April 13, 2011

Romesco! That's fun to say!

Finally, the weather has turned slightly warm. After 2 (yes two) snowstorms in April, we have finally been cut a break here in Maine. As soon as the temperature reached about 40 people were out in shorts and t-shirts. I wasn’t that brave, but I have put away my socks and shoes and will heretofore be only wearing sandals or sockless flats.
Don’t get me wrong, as of this morning our backyard was still half covered under snow. So it’s not that warm, but when you’ve had winter for over 5 months, you take what you can get. In fact, we (more like I) were so eager for spring that we started garden box #1 this weekend. It may be a bit early, but I couldn’t hold out any longer. Since I only used half of my seeds from last year, we are planting a lot of the same things; radishes, beets, and lettuce in this box. As an added bonus I had about 6 tiny little leek plants survive the winter, despite my best efforts, so those too have been transplanted into the garden box. But the really exciting news this year is that we have planted fava beans! (I will spare you the weird Hannibal Lector slurping noise – oops, you probably heard it in your head anyways) So hopefully, if the seed packet is accurate, in 50-85 days I will have a fava bean story to tell you.
For now though, we are left with co-op and grocery store produce. Which is by no means bad, and since the weather is so pleasant, we have taken our cooking outdoors. From the numerous posts last year about food prepared on the grill, it’s safe to assume that I was excited to fire it up again this year. After a first round of burgers, we decided to try something different. So we scoured the grilling cookbooks in my collection and landed on romesco sauce.
Romesco is a Spanish sauce that is usually served with grilled fish, meats or even pasta. It’s made mostly from red peppers and almonds which makes for a nice texture and flavor. We grilled all of the vegetables for this sauce, and then blended it in the food processor. The sauce by itself is actually vegan, so if you want to spoon it onto grilled portabellas or tofu – go for it.


Grilled Romesco Sauce
As adapted from 30 Minute Vegetarian Grilling
This recipe makes a lot, so freeze leftovers or serve it later in the week over pasta.

3 red peppers, whole
3 medium vine ripe tomatoes, whole
3 cloves garlic, peeled
1 medium yellow onion, halved and skin removed
1 small red chili pepper (such as fresno)
½ c raw almonds
½ c dry bread crumbs (more if necessary)
Olive oil for thinning
Salt and pepper to taste


Toast almonds in a 350° oven for 10 minutes, or until lightly browned and very fragrant, set aside.

Skewer the peeled onion halves, garlic cloves and chili pepper. Place skewer as well as the peppers and tomatoes on the grill and cook until vegetables are tender. The pepper skins should be blackened and the tomato skins should be peeling off.

Remove skins from peppers and tomatoes, and place into a food processor. Chop root off of the onion and add with the garlic and cooled almonds to the food processor. Pulse to combine, while drizzling in olive oil. If sauce is too watery, pulse in bread crumbs. Season with salt and pepper.

Serve over grilled seafood or other vegetables.

Friday, April 8, 2011

A! O! Calzone!

Afterschool snacks are the best. My favorite was always a bowl of cereal. Apparently, after I left for college, my mom noticed a steep decline in the household consumption of milk. While in high school I was not coming immediately home, and did not have access to bowls of cereal and ice cold milk. Thus I needed to find an alternative to my afterschool snacks.
Perhaps because the popular lunch for my friends and I was a plain bagel dunked in nacho cheese (I am not proud of this), I seemed to always be very hungry after school. Plus the addition of friends with cars, a whole new world of food possibilities had opened up to me, specifically pizza and pizza joint related foods. Garlic Knots are one of the single greatest foods on the planet. Period. And I will share more about these sometime in the future. When you’re ready. They can be a powerful weapon and should only be used for good.
Instead we will talk about calzones. The original pizza pocket. Yeah, I know calzone is a fairly substantial afterschool snack. But remember, bagels dipped in nacho cheese necessitate something hearty. Personally it has been a while since I had a calzone, and I tend to skip over them on menus. But the other night reawakened my passion for a good calzone. 1. They are so easy to make. 2 They taste really good and 3. You can dunk them in marinara sauce.
You can put whatever you want inside of a calzone, but I like to stick to basics including but not limited to; cheese, meat and vegetable. I also make the dough here, because I like how it holds together, and how quickly it rises. But if you don’t have time, feel free to buy refrigerated pizza dough, but be careful not to tear any holes in it. And if you can make the edges look pretty, this is a very fancy thing to pull out of the oven to impress someone.
Calzones

For the dough
1 package of dry yeast
1 cup warm water
1 Tb sugar
1 Tb olive oil
1 tsp salt
2 ¼ c flour (or half whole wheat and half all purpose)

For the filling
1 c. skim milk ricotta
1 lb. hot Italian sausage, casings removed
1 package fresh spinach
1/8 c. diced roasted red peppers
½ c grated mozzarella cheese
Juice of ½ meyer lemon
½ tsp. garlic powder
½ tsp. dried basil
½ tsp. dried oregano
Salt and pepper to taste

Combine the yeast and water in the bowl of an electric mixture and let sit for 5 minutes. Then add in sugar, oil and salt. Gradually blend in flour until the dough forms into a ball. Remove dough, and wipe out bowl and grease with about 1 Tb olive oil. Return dough to bowl and let rise, covered for about an hour, or until doubled in size.

While dough is rising, remove sausage from its casing and break up. In a medium skillet over medium high heat, cook sausage.  Drain off fat, and remove sausage to a bowl to cool. Toss in spinach and cover bowl, to slightly wilt spinach. Add cheeses, roasted red peppers and spices, stirring to blend. Place bowl in refrigerator until dough is ready to use.


Once dough has doubled in size, punch it down and divide it into three equal parts. Preheat oven to 400°. Roll out each ball into a circle, so that the dough is about ¼” thick. Place one third of the filling on one half of the dough leaving about ½ inch from the edge. Fold the dough over the filling and twist or crimp together the edges. Repeat with the remaining balls of dough and filling.

Gently lift the calzone and move to a greased baking sheet or pizza stone. Brush each calzone with beaten egg and back 20-25 minutes, or until the dough is golden brown. Allow calzones to cool slightly, then serve with warm marinara sauce.