Wednesday, December 22, 2010

Say What? Ceviche!

There is a fish market in San Pedro, California. It is amazing, but not for the faint of heart. It’s loud, and crowded and not sparkling clean, but it is amazing. I don’t remember how Joe and I came upon the fish market one Saturday morning to find the bustling complex of stalls and cooks. Maybe I wanted to go to just buy a fish for dinner. However we found it, we walked into something we were totally unprepared for.

You can buy whole, filleted, chunks, cooked, combo-ed, basically any imaginable preparation of (or lack thereof) fish at this market. But apparently, what most of the crowd was doing, was eating. So Joe and I quickly abandoned our plans to purchase a fish and take it home. We walked around looking at what people were eating, and smelling what others were cooking. We settled on a promising line, offering trays (yes, cafeteria style plastic trays) piled with all sorts of fish and vegetables.
Most of the fish markets’ clientele were families sitting together at tables on the dock pulling from overloaded trays of food. We needed to be part of that. So we got on line and patiently waited, perusing the menu with pictures above the cooks. Number 1 seemed to be a pile of shrimp with peppers, onions, and potatoes, garlic bread and tortillas. Number two was more of the same with the addition of grilled fish. And on this went up to I believe 8 options. Each larger and more appetizing than the last.

Number 2 is what we settled on, and so what if it was for a family of 4? Joe and I could handle it, with the aid of some gigantic Coronas, the Southern California sun and a Mariachi band roving between the tables. But, what really caught my eye, was the smaller stand in front of the grilled trays of fish offering raw treats. It was like the candy in the grocery store isle and upon checkout, I was pulling at Joe’s shirt and begging to just have one piece.
This is where it does not help to be squeamish. I’m sure everything was perfectly safe to eat, and I did not get sick at all. But the combination of fish smell, high heat and lots of people don’t typically give off a good impression when you are about to eat raw fish. I, however, was undeterred.

We got a cup of ceviche. It had tomatoes, and fish and scallops and shrimp and octopus, cilantro and plenty of lime. They also offered small bottles of San Pedro Fish Market hot sauce, which I happily bought for a dollar to douse on top of my ceviche. In fact that hot sauce was so good, I popped it in my purse and have since moved it across the country to Maine. I ration it out now for only truly special occasions. But if anyone wants to head to San Pedro and pick me up a bottle, I will happily send you the $1 for it.
But I digress. The ceviche was a fantastic combination of cool and spice, refreshing and stimulating. I fell in love. Joe and I went back a few more times to the San Pedro fish market to get whole grilled fishes, more trays of mixed dishes and of course the ceviche. And when we moved away, that was one piece of Southern California I was really going to miss.

So when the opportunity for my office Holiday Potluck arose, I thought I would make ceviche. And not just because I knew no one would have heard of it. I really wanted a little reminder of the sun and mariachis and relaxation this winter.

Ceviche
This turned out a little more like the pico de gallo salsa that I used to make frequently. But I like this version, and it is less scary then a mound of “raw” fish for the uninitiated. The reason I put raw in quotation marks, is because the citric acid in the lime and lemon juices change the protein structure of the raw shrimp to make it seem like it has been cooked (and for all you chemistry folks out there, it really gets denatured, but I didn’t want to get too technical).
Also, I used Maine shrimp for this, as they are running this time of year. But, if you can’t get Maine shrimp (you can order them online from all the places you might order live lobsters from Maine) you can use any small cold water shrimp. The flavor is a bit sweeter and goes well with the citrus and spice. And give yourself plenty of time to let the mixture marinate; at least 6 hours. (I like overnight)

1 pound small cold water shrimp
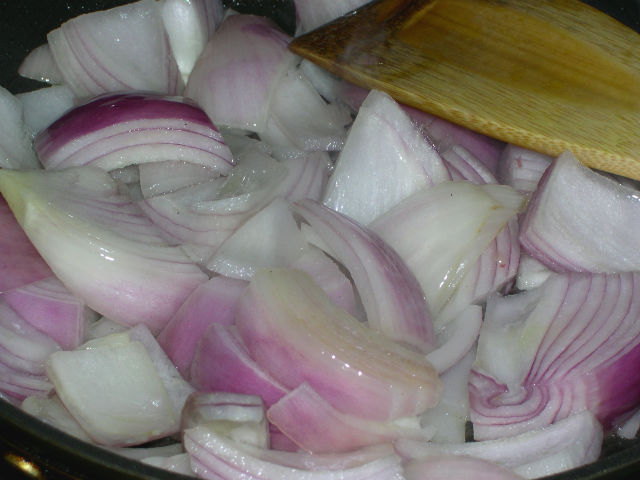
½ large white onion
3 cloves garlic
1 jalapeño pepper (I deseeded one half of the pepper, but left the other half intact, you can vary this for the amount of heat you prefer)
4 medium vine ripened tomatoes, quartered
½ seedless cucumber, peeled
1 large bunch cilantro
4 large, juicy limes
1 large lemon
Salt
Pepper
1 tsp. Cumin
½ tsp. Paprika

Roughly chop the onion, garlic and jalapeño and place them into the bowl of a food processor. Pulse a few times to break them down. Next add the cilantro, tomatoes, cucumber, salt and pepper and pulse until the tomatoes are chopped into ¼ pieces. Do not over process or you will have a delicious salsa and not a ceviche.

Move this mixture to a bowl and add lime and lemon juice. Peel the shrimp and chop into thirds. Toss the shrimp into the bowl with the other ingredients, add cumin and paprika and stir to combine. Make sure to press all of the shrimp down into the mixture so that they are covered by the liquid.

Serve with tostadas or tortilla chips, or just a spoon.

Wednesday, December 15, 2010

I Am Not An Italian Nona

I don’t know if you knew that about me, but I’m not. In fact my WASP-y heritage prohibits me from becoming one, even though this is my lifelong dream. Basically, this means that I want to be really good at cooking Italian food. I’m not bad at it, but it does not come to me with ease or grace.

While in college some of my closest friends came from Italian backgrounds, and I was able to learn some basic principles from them through their family recipes. But as you can imagine, it is hard to cook gigantic dinners in college apartment s and dorms. Not impossible, but hard.
My group of friends and I would try to have “Family Dinner” on Sundays or at least once a week. This would be at various people’s apartments and usually consisted of giant quantities of food (we are talking college aged men here - they eat a lot). My sophomore year college dorm room had a tiny kitchenette that consisted of a sink, a small stove and oven and a refrigerator. There was approximately 2 square feet of counter space, which lead to creative storage and dish drying spaces. When I moved in, my mom unloaded all of her old pots, pans and utensils on me –most of which I actually still have.

In particular she gave me a gigantic stock pot. When I first got it, I said “Mom, I am never going to use this thing – it’s HUGE!” And she replied with a “Well, just keep it, you never know.” And once again the wisdom of mother panned out. I managed to cook up to 3 pounds of pasta at one time in it, which was just about how much was needed for a group of 6-8 college students.
I learned how to make marinara sauce, meatballs, eggplant parmesan and other dishes though the tutelage of college friends. And now, with Joe’s family, I have been able to learn even more about the art of Italian-American cooking. But the very intense crazy 'grandma-only' dishes have yet to be conquered by me.

For example, I tried to make Joe a 'welcome home' dinner this past Sunday of braciole. For those of you who don’t know what braciole is, it is magical. I had a bit of it from a friend’s grandmother once, and I would have had some from Joe’s Nana, except that he ate all of it before I could get my fork in there. Braciole is a piece of meat, either veal or beef, pounded thin and then wrapped around breadcrumbs, seasoning and hardboiled egg. It’s then braised and served with a tomato sauce and pasta. Like I said, magical. So I found a recipe online, and thought I could spend all day Sunday making it.
To make a long story a bit shorter, it didn’t turn out the way I wanted. Joe mentioned that he was glad he was not around to witness the debacle. There was profanity and the throwing of things. Wrapping meat around a filling successfully is my kryptonite in the kitchen. The braciole didn’t look good, but it tasted fine, and the sauce that went with it was great. So that is what I would like to share with you here today. If you know how to make braciole, or if you keep a small Italian grandmother hidden away for such occasions, please feel free to add it to the recipe.

Meat Braised Marinara Sauce As adapted from Tyler Florence’s “Ultimate Braciole”
I typically find Tyler Florence’s recipes good if not a little too involved. But this one looked promising. If you care to find his recipe for braciole, go ahead and give it a shot, but I am just going to share the sauce portion, which is still very good over pasta.

3Tb Olive oil
2 cloves
6 sprigs of thyme (washed but not chopped)
1 small (1-2 pounds) beef roast, or flank steak
1 medium onion, thinly sliced
1 ½ c beef broth
2 bay leaves
1 28oz. can crushed tomatoes (with no additional seasonings)
4 whole vine ripened tomatoes
½ pint grape tomatoes, whole
Salt and pepper
2 Tb balsamic vinegar
3 Tb parsley, chopped

Preheat the oven to 350°, and season the meat with salt and pepper. Heat the olive oil in a dutch oven and add the garlic cloves and thyme. Once the garlic is fragrant, add the meat and brown on all sides. If the thyme and garlic start to brown too much, remove them from them from the oil, and set aside. Once the meat is browned, remove it to a platter and set aside.

Next add the onions and sauté until soft, about 3-4 minutes. Then add in beef broth and bay leaves, scraping up any brown bits on the bottom of the pan. Once the beef broth is boiling, add in the can of tomatoes, the reserved garlic and thyme and stir to combine. Once the mixture is fully combined, add back in the meat.

Nestle in the whole tomatoes around the meat, and toss in the grape tomatoes. Season with salt and pepper. Bring the entire mixture to a simmer, then cover and place in the oven. Cook for about 2 hours, or until the meat is form tender (it will shrink in size a bit). Then remove the pot from the oven, and set the meat on a platter, and shred with a fork. Remove the whole tomatoes from the sauce, as well as the bay leaves and thyme springs. Blend the remaining mixture in a blender or with an immersion blender until combined. Then place the pot over medium heat.

Peel off the skin from the large whole tomatoes, and crush, then return them to the pot. Also, add back in the shredded meat and any juices that may have accumulated. Bring the pot to a simmer. Add in the balsamic vinegar and parsley and simmer for about 5 minutes. Check for seasonings, and serve over cooked pasta.

Thursday, December 9, 2010

Zwiebelkuchen

Yes, Zwiebelkuchen. Don’t be scared. I’ll walk you through it. Svee-bell-coo-tschen. Well, that’s basically right, the tschen is really more of a throat noise, like if you were pretending to hiss with the back of your throat like a cat – that’s the noise we’re going for. Go ahead, give it a try. No one is judging you here. Zwee-bell-coo- (hiss like a cat)en. Good!

Ok now that we got that out of the way, Zweibelkuchen is an onion cake. Don’t say eww just yet! Onion cake is not literally a layer cake made from onions, it’s more like a quiche or savory tart. A crust, onions, bacon and a light custard make this little baby up, and it is delicious. This dish is found in many different countries with slight variations, but the alpine region in Europe does it the best (in my opinion). So whether you are in France, Switzerland or Italy, try it! But if you are in Germany, I implore you to get a slice.
This was another one of those experiences that was a perfect food memory for me. I had Zwiebelkuchen twice while in Germany, and now ever since I found this recipe I have been hooked. The first time I had it, was at a traditional wine harvest dinner. This was a bit more commercialized than me harvesting grapes from a sun drenched vineyard. But never the less, there was a farm, and the farmer sold tickets to his harvest dinner. In south-west Germany, it was common for farmers to need extra hands in the fall. Workers were fed a light dinner of Zwiebelkuchen and given the Neuesüsse wine to drink that evening.
Neuesüsse is the sweet, barely fermented wine that is bottled and shared directly after harvest. It is very sweet and everyone recommends not having too many glasses of it for the sake of your bowels. But it is good and it is cheap, which of course, is even better. If you can find a bottle at a farmer’s market, you can let it ferment more on a shelf, but be sure to uncork it, or the bottle is rumored to explode on you as the pressure builds.
The other time I had Zwiebelkuchen was when a roommate of mine (and I will save some of the fabulous stories about my roommates in Germany for another time)made it with some friends. This was an opportunity for onion googles, if I have ever seen one. They chopped so many pounds of onions, that the tiny apartment kitchen was lethal to be in. If someone walked into the kitchen they were hit with a wall of onion gas. It was beautiful.

So if you are stuck in a rut for holiday potluck options. Give this a try. You can follow the recipe I will share below, or you can cheap it up a bit, and use refrigerated crescent rolls, ham and a little bit of cheese for a quick brunch option.


Zwiebelkuchen
As adapted from The New German Cookbook by Jean Anderson and Hedy Würz

2 sheets puff pastry, defrosted and at room temperature
7-8 slices of thick cut bacon, chopped into small squares
1 lb. yellow onions, thinly sliced
2 tsp. caraway seeds
½ tsp. nutmeg
½ c. whole milk
¼ c. heavy whipping cream
2 eggs, beaten
salt and pepper to taste

Preheat the oven to 400°. Pinch together the two sheets of puff pastry dough and roll out to fit into a 15”x12” cookie sheet (standard size), there should be about a ½” overlap up the sides of the baking sheet.

Sauté the chopped bacon in a large skillet over medium heat, then remove the bacon, but keep the grease in the pan. Add sliced onions into pan and sauté for about 7 minutes until translucent. Then add caraway seeds and nutmeg and continue to sauté until the onion is very soft, another 7-10 minutes. If the onions start to get brown, turn the heat a little lower and stir more frequently. A little brown on the edges is fine, but not burnt or completely caramelized.

Next, pour the onions onto the puff pastry and sprinkle with bacon bits. Pull the extra puff pastry over top of the onion and bacon, forming a bit of a lip around the entire tart. Bake the Zwiebelkuchen for 15 minutes. Meanwhile, combine the milk, cream, eggs, salt and pepper. After 15 minutes remove the cookie sheet, and pour the milk mixture over top of the onions. The milk mixture should not cover the onions completely, so feel free to reserve any excess milk and egg mixture for another purpose (scrambled eggs or like Joe and I did for a ghetto carbonara). Return the cookie sheet to the oven and continue to bake for another 20-25 minutes. If the edges of the pastry get too brown, cover the sheet loosely with aluminum foil.

Once the custard has set (is no longer jiggly) remove the Zwiebelkuchen from the oven and let cool about 20 minutes. Then slice and serve! I like Zwiebelkuchen warm, but I love it cold or even reheated the next day.

Thursday, November 18, 2010

Raw Harmony

Thanksgiving is next week. I’m sure you have made plans about where to eat, what to eat and when to eat. But I just thought I would offer up one more suggestion.

I have not yet made Thanksgiving dinner all by myself yet. I mean, I have cooked Thanksgiving dinner with my family now for years, but I have not single-handedly attempted this feast. I once made a toned down version of it for a couple of friends when Joe and I were in California, but that was only because I had a coupon for a free frozen turkey from the grocery store. So I don’t know if that counts.
When I was little my family always went to my grandparent’s house in Delaware. And I mentioned here before, that I could stand in the kitchen and watch my grandmother cook for as long as I wanted. I remember being almost at counter-height watching her reach into a gigantic pale turkey and pull out its giblets. I told her it was disgusting. And she laughed and told me I too would do it one day. I believe my reaction was a gag as I told her “No way!”
Well, that day has come. I no longer fear reaching up the backside of poultry and scooping out whatever meaty bits are left intact. But this is not the case for many people around this holiday. In fact, in the spirit of full disclosure, I once vowed to become a vegetarian at Thanksgiving. It may have been the same year I decided raw turkeys were gross. I excused myself from the table, ran down the hall into my mother’s childhood bedroom, flung myself on the bed and started crying. When my mom came in and asked what was wrong, I told her we shouldn’t eat meat because it’s mean to the animals. And if you know my mom, you’ll understand her reaction.
"Are you kidding? Where did this come from?”
“I just decided” I sobbed.
So for everyone next week, who doesn’t eat meat, or doesn’t eat any animal products, or for anyone who just needs something to bring to a Thanksgiving dinner; this recipe is it! It is easy and quick, can be made ahead of time or ten minutes prior to eating. And although there is a very similar recipe in the NY Times this week, I assure you this one is different.

Raw Sweet Potato Maple and Cranberry Salad
Adapted from Joan Nathan's The New American Cooking
This recipe is very versatile. You can switch the orange juice for lime, or the parsley for cilantro or the maple syrup for honey. This dish fits into the theme of Thanksgiving with a modern twist. But be warned, it will make a lot!

1 large red fleshed sweet potato, peeled
2 small cloves garlic, peeled
1/3 c. flat leaf parsley
1/3 c. dried cranberries
Juice of one orange (or tangerine)
1 ½ Tb. Pure Maple syrup (preferably dark)
Salt and pepper to taste

Grate the peeled garlic into a bowl. Next, chop the parsley and cranberries together until relatively fine. Grate the sweet potato on a box grater using the smaller size hole. It will be a bit watery, but don’t squeeze the juice out. Next combine all the ingredients together and stir. Taste for salt and pepper and add as desired.

Wednesday, November 10, 2010

Onion Goggles

My grandmother used to wear “Onion Goggles.” This is not the same as beer goggles, although actual visibility may be just as impaired by either. No, Onion Goggles were the science lab type of eyewear protection my grandmother would wear while chopping onions. I only remember her wearing them sometimes and I can’t tell you what she was making while wearing them, but I am guessing anything with a lot of onions.
I used to love that she had onion goggles, and I would wonder why we did not have onion goggles at home for all of our onion chopping needs. During the holidays I could stand in the kitchen and watch her cook. She would pull out the onions, open her kitchen drawer, don the goggles and get to work. My eyes would always tear up, and she would tell me that I needed a pair of onion goggles. I’m not sure if I ever was given a pair, but hopefully there is a picture somewhere of my grandmother and me wearing our onion goggles standing at the kitchen counter.
I too have enlisted the help of eye protection occasionally when cutting onions. If the amount is small enough I will tough it out and have myself a good cry. But when I am cutting a lot of onions, I may bust out some old swim goggles and strap them to my head. I must say, that swim goggles are not the ideal goggles to use on dry land. My goggles constantly fog up, and make it extremely dangerous to continue chopping.

When we were living in California, I had offered to make the stuffing for a large family style Thanksgiving meal at the bakery I worked at. This meant stuffing for about 120 people. And if you remember how I have a problem gauging how much food to make – it will come as no surprise that I made waaaay too much stuffing. Plus, working at the bakery gave me access to all the different types of bread I could ever want in a stuffing. At any rate, I made about 40 pounds of stuffing. Which of course called for about 10 pounds of onions.
When chopping 10 pounds of onions you really do need eyewear protection. I tried everything else – freezing the onions, cutting them under water (which is a surefire way to cut yourself and make it look like a scene from Jaws in your kitchen sink), lighting a match and so on, but goggles are simply the best. And the reason I am mentioning this now, is not for a recipe on stuffing (although I may do that later) but for onion soup.

For a good onion soup, you really need to cut a lot of onions. I will give you a recipe that calls for a certain number of onions, but the goal here is to force other people out of the kitchen with the huge amounts of noxious onion gas you will be unleashing. Or better yet, if the people in another room of your house, have to leave or open a window – you know you have cut the appropriate amount for a good soup.
To me, French onion soup is a great, simple meal that is best on a cold and damp day. I have had onion soups from powdered mixes, cans, and restaurants. I have had soup with bread, no bread, gruyere cheese, swiss cheese and mozzarella cheese. And I like them all. The following recipe combines a couple of techniques which make it less labor intensive and creates a wonderful aroma that will push out the stinging bite of raw onions left hovering in your living room.

Many Onion Soup
I like using different types of onions in this. Traditional brown or yellow onions are a great base of flavor and can be supplemented with other kinds – red, cippolini, white, etc. You can use some sweet onions, but I do not recommend using a lot. Since the onions will be caramelized, the sweeter the onion to start the blander it will become once it is cooked.

3 pounds assorted cooking onions, cut in half and sliced
2 Tb. olive oil
3 Tb. Butter
1 tsp. dried thyme
½ c. sherry
2 c. Beef broth/stock
Salt and Pepper to taste (the salt really helps heighten the flavor here)

Sliced French Bread
1 garlic clove, peeled
1 ½ c. grated gruyere cheese

Preheat the oven to 425°. Place the olive oil into the bottom of a large heavy bottomed pot, and toss in onions. It will look like a lot of onions. Dot the onions with the butter, and bake uncovered for about 50 minutes, stirring occasionally.

Pull the pot out of the oven, and place over medium heat. Stir occasionally, scraping up any brown bits that may appear. This will speed up the caramelization process. Then add the thyme, a dash of salt and pepper and stir to combine.

Add the cooking sherry and boil rapidly to boil off the alcohol. Next, add the beef broth and bring to a simmer. If your soup is a little light in color, feel free to cheat and use some gravy master – it won’t change the flavor at all. Taste for seasonings.

Meanwhile, toast your slices of French bread in the oven. Once slightly browned, rub the garlic clove over the bread.

Ladle the onion soup into individual, oven proof bowels, and place a slice or two of the French bread on top. Cover the whole bowl with grated cheese. Repeat for the next bowls. Place the bowls on a baking sheet and place under the broiler until the cheese is melted and slightly brown, a few moments only.

Pull from the oven, and serve.

Makes 3-4 servings

Saturday, November 6, 2010

Wing Weekend

Ahh, Football season. For some this means the next few months will be filled with fantasy, free agency and trades. For me, it is an excuse to eat junky appetizers washed down with beers on a Sunday afternoon. 
 There are so many instances, sitting around with friends, cheering or booing that I look back fondly upon. Like ordering 3 buckets (yes Buckets) of wings from a local chicken wing joint during the AFC championship, where guacamole and Oreos were the only break in wing consumption we had that day. Or meeting the actor who played Steve Urkel, who looked an awful lot like Stefan, at the Eagles bar in West Hollywood.  (Yes, I'm name dropping.)
I may have mentioned that I have a special weakness for appetizers. Frozen appetizers are the food I am most ashamed to admit that I love. The thing is, I know they are not even that good. I am a sucker for packaging and advertising. A commercial filled with people having fun and eating previously frozen pizza puffs, hooks me every time. And the siren call of appetizers at restaurants, lure me in to a false hope of deliciousness. Combo platter? Yes, with all the dipping sauces you have please.
In fact, after college when I was living in a house with a couple of girlfriends, we would have roommate happy hour. This entailed cheap very fruity “wine”, frozen appetizers and a good dose of America’s Next Top Model. Now, of course Joe will indulge me sometimes, but I can only get him to agree to 2 out of those three items. So I take full advantage of any opportunities that present themselves to indulge in tiny pre-meal bites.
Wings are the ultimate appetizer to me. Special enough to require some time and effort in preparation – or just a really great wing bar. But wings at home almost seem exotic. Should they be fried, or oven baked? And don’t even get me started with sauce options.

For me, wings should be tender and the meat should fall off the bones. You should not be able to eat wings daintily, and you should feel good about having carrots and celery in between bites of wings. So the next time you have an America’s Next Top Model marathon, or just need to sit on the couch and watch football for 5 hours straight, here is an easy, tasty wing recipe.

Tar Pit Wings
as adapted from Gourmet Cookbook

Be sure to foil the bottom of the pan. The sauce has a tendency to boil up in the oven, and will be a pain to clean if you don’t properly foil the pan. The sauce will also look like a lot, too much even, at the beginning of the baking process, but don’t worry it’ll all work out in the end.

1 lb chicken wings, split and wing tips removed
1/3 c. light soy sauce
1/3 c. dry red wine
1/8 c. sugar
1 tsp ground ginger
Black Pepper to taste

Preheat the oven to 400°. Place wings in a single layer, in the bottom of a foiled roasting pan. Combine the soy sauce, wine and sugar in a small saucepan over medium heat. Bring to a simmer, and stir until the sugar is completely dissolved. Remove from heat and stir in ground ginger and black pepper. Pour sauce of the wings.

Bake wings for about 45 minutes, then turn the wings over. At this point about 1/2 the sauce should be left. Continue to bake for another hour and 10 minutes, or until the sauce is sticky and the wings are super tender.

Let the wings cool until you are able to handle them. Serve and enjoy!

Wednesday, October 27, 2010

It's Shepherd's Pie Time

Mainer’s have a different idea about what Shepherd’s Pie is than what I was accustomed to. And if you tell a Mainer that their version is not what you have typically seen or had before – they will look at you like you have 3 heads, or that you are simply “from away.” Typically the Maine version contains ground beef, corn kernels, and some kind of gravy flavoring, all topped with mashed potato.
I know that the beauty of Shepherd’s Pie is its versatility, but I had always viewed it as a one dish meal; or an easy, cheap, pretty good tasting meal. I was brought up with Shepherd’s Pie being ground beef, mixed frozen veggies, baked in a pie shell and topped with mashed potatoes. You can make this meal for under $10 and that includes buying natural free range beef.
I made Shepherd’s pie for Joe once early on in our relationship. He was blown away. He ate the two pies I made all week for various meals – breakfast, lunch and dinner. He wasn’t so much impressed by my skills at adding frozen vegetables and cooked ground beef into a frozen pie shell and baking it, but by it’s simplicity and inherent comfort.
Shepherd’s Pie traditionally (or so I have read) was chunks of mutton cooked with some root vegetables and topped with more root vegetables. If you happen upon a good Irish pub in the states you may get this. I can’t speak to what the dish is in the British Isles, but in my dreams it is lamb stew with a crust and potatoes. But I think you can really play around with this dish to make it fit your tastes.
Crust or no crust. Frozen mixed vegetable, or fresh organic root vegetables. Instant mashed potatoes or fresh mashed Yukon gold potatoes mixed with celeriac. Or ground beef or natural organic ground lamb. It’s all up to you and your budget. At this time of year when the wind is howling and rain is slamming your windows, it’s nice to have the smell of comfort emanating from your oven.
Shepherd’s Pie
The basic formula is meat + veg + mashed potatoes. Expand upon that as you wish. The pie in these photos is made from the recipe below.

For the Topping
5-6 medium potatoes, peeled and chopped into ½” chunks
½ a medium celeriac, peeled and chopped into ½” chunks
2 Tb butter
¼ c milk (or more)
Salt and pepper to taste

For the Pie
1 frozen deep dish pie shell

1 lb ground lamb
4 small carrots, peeled and diced
1 small onion, diced
2 cloves garlic, minced
1 leek, diced
3 Tb Worcestershire sauce
1 tsp all spice
Salt and pepper to taste
Beef Broth (optional)

Preheat the oven to 375°. Place chopped potatoes and celeriac in a sauce pan of water and boil until fork tender, about 10-12 minutes.

Meanwhile, sauté ground lamb, onions and garlic together in a large pan. Once the onions are translucent and the meat is mostly browned, add the leek and carrots. Stir to combine and continue cooking until the meat is completely cooked through. At this point, you can either drain off most of the fat from your pan, or if you are using a leaner meat, decide if you need to add some beef broth. The meat mixture should be moist but not very wet. We’re looking for saucy here. Then add the Worcestershire sauce and spices, stirring to combine. Taste for seasonings.

Spoon the meat mixture into the frozen pie shell.

Drain the potatoes and celeriac. Mash together with milk and butter, adding salt and pepper as desired.

Dot the top of the pie with mashed vegetables, and smooth to coat the top of the pie evenly.

Place pie on a baking sheet and bake for 20-30 minutes until the mashed potatoes have browned lightly and the crust is cooked.

Let the pie cool for as long as you can stand to wait, then cut and serve.

Thursday, October 21, 2010

In Honor of June Cleaver

My house growing up was full of people and activity, that is, if we were home. Both my parents worked, multiple jobs and they usually took us with them if we weren’t in school. Some of my favorite memories are of having chicken broth out of a vending machine at the YMCA or eating Apple Jacks in the back of my Dad’s Dodge Colt while he delivered newspapers early one morning.
That is not to say that we did not have family dinners. We just had ours a little differently. At a fairly young age, my mom had my sisters and I cooking at least once a week. This included planning the menu, adding it to the grocery list and then preparing and serving it. My go-to meal was frozen raviolis (it still is, I usually have a bag for when I just cannot cook anything that requires thinking). I do remember gathering around a table for meals and trying to get my sister to laugh so hard she shot milk out of her nose. I was on a role for a while until my mom threatened us with some unnamed horrible punishment if Jen’s milk went anywhere but down her throat.
Or a few years later setting the table complete with glasses of milk (I had given up trying to neti-pot my sister with milk by this time) then coming back to find our little dog standing on the table lapping the milk out of everyone’s glasses. We had and still have a lot of good times around the dinner table. And I understand how hard it must have been to ensure we always had some time set aside for family dinners.
Today, I am blessed with a job that lets me get out of work fairly early by normal standards. And when Joe is in season, I have even more time to get dinner on the table. I’m no June Cleaver (my apron has a swear word on it heehee) but I like to have dinner ready for when Joe comes home. Not every day, and I have previously mentioned how after a bad day I may in fact be on the couch in the dark 2 martinis in by the time Joe comes home (hence the frozen raviolis).
Not everyone has this much time to cook dinner, and I always like to look for recipes that can be done quickly and taste good. While visiting my ex-college roommate and her husband this past weekend, I got to thinking about how difficult it can be to prepare something healthy and varying week to week. So Neerali, this one is for you.

Pork Agrodolce
As adapted from Gourmet April 2008 and Cooking Light
This is a quick and dirty way to make agrodocle –but I really like it. Be warned however, it is very strong on the vinegar flavor, so if you don’t like that, this recipe is not for you. I typically make this sauce for pan seared salmon, but the store was completely out of wild salmon. If you want to use salmon follow the * for directions below. This pork version takes a little longer but the hands-on time is about the same.

For the Pork
1 pork tenderloin
Olive Oil
Salt
Pepper
Fresh (or dried sage) optional
Dried mustard (or fresh) optional

Agrodolce
1 large red onion, cut into 8 wedges (if it is a gigantic onion cut it into 16 wedges)
2 Tb. Olive oil
2/3 c. balsamic vinegar
1 tsp. sugar
½ tsp. salt
1 Tb butter

Preheat the oven to 400°. Rub the pork with olive oil and spices. Place pork on a foiled baking sheet or roasting pan and cook for about 20-30 minutes, until cooked all the way through. (if you have a meat thermometer, the pork should register about 140° or longer if you want it less pink)

Once the pork has finished cooking, turn off the oven and let it rest. While the pork is resting, cook the agrodolce. Heat the olive oil in a sauté pan, and add red onion, some of your wedges will fall apart, but don’t worry. Cook onion for about 6-8 minutes until their color has lessened and they start to get a little brown. Then add sugar, salt and vinegar. Cook for another 5-7 minutes until the vinegar is thick and syrupy. Add the butter to the sauce and stir until it is blended into the sauce. Spoon agrodolce onto plate and serve with sliced pork over top. This can be served with your favorite vegetable (roast broccoli) and potatoes or egg noodles (I have a weakness for egg noodles).

*For Salmon, take wild salmon and slice filets into single serve portions. Sprinkle with salt and pepper. Heat olive oil in a pan, and cook salmon skin side UP for 8-12 minutes, until a nice golden crust forms on the salmon. Flip and cook for another few minutes. This version is much more quick then the pork, but both are fairly easy.

Thursday, October 14, 2010

Recovery Sunday Soup

This past weekend was filled with weddings, being as it was 10-10-10 and all. Although Joe and I did not go to a wedding on that auspicious day, we did attend a friends’ wedding that was lovely. Since Joe was in this wedding, we had some responsibilities and duties, for the groomsmen that of course included imbibing before the ceremony. And for me, it meant trying to keep my new heels on for most of the night.

One of the things I love about weddings (besides the glorious celebration of love of course) is the food. Cocktail hour is a big highlight for me, and if you remember my love of all things small – you know how crazed I may have gotten around tiny hamburgers and small bites of tuna tartar. Plus during cocktail hour you can get one or two martinis before receiving disapproving looks from bartenders, and having to switch to wine.
Without going into too much detail, there is a game that Joe’s friends play at weddings, that encourages a very good time by all. Basically you draw a name of a fellow wedding guest and if the person you drew, drinks too much and makes a fool of him/herself you win the prize. Granted no one wants to make a fool of them self, or at least only a select few will admit to wanting that outcome for themselves, but these things have a tendency to sneak up on you.

And if you are hoping that this story will lead to me regaling you with tale of public embarrassment by myself or Joe, sadly I will not deliver. What this story will lead to is the need to recover the day after a wedding. Typically Joe and I need to drive back to Maine the day after any celebration, which is one of the worst tasks known to man. Traffic on the Mass Pike does not mix well with a queasy stomach and a pounding headache –let me tell you.
But this time, we decided to spend an extra day visiting friends, who had also participated in a wedding the day before. A sorry sight we all were, eating takeout and watching football through half open eyes. We decided something good for us, nutritious and filling, comforting and cleansing was the way to recovery. A soup. Well, vegetables to be exact. After slowly destroying livers, it was necessary to balance out the equation with the restorative powers of vegetables.

Nothing says hearty, vegetable soup like a butternut squash soup. I like to make this fairly frequently during the winter, and it is very easy. It can be completely vegan and gluten free yet pleasing to even the most die-hard of carnivores. However, on this particular weekend, there were no Butternut squashes at the WholeFoods in Montclair. Which called for a plan B – anything But Butternut Soup.

Anything But Butternut Soup
You can make a “butternut-esque” style soup with any of your orange fleshed winter squashes. The most sweet and tender the squash when cooked, the better. We used a combination of Acorn, Delicata and Ambercup. I like the flavor best when you roast the squash first, then puree it -you keep all the best flavors of the squash intact.

3 c. cubed assorted yellow or orange fleshed winter squash
½ small onion, diced
1 Tb fresh thyme
Pinch of cayenne pepper
2 Tb olive oil, divided
12 oz. vegetable or chicken stock (one carton)
Salt and pepper to taste

Cut off the skin of the squash, scoop out the seeds and chop into 1”cubes. Toss with some salt, pepper and 1 Tb of olive oil, then spread onto a baking sheet and roast at 375° until tender – about 30-45 minutes.

Next heat 1 Tb olive oil in a sauté pan, add onions, thyme, and cayenne pepper cook until onions are soft and translucent, about 7- 10 minutes. One the squash is cooked, add half to the sauté pan with the onions, stirring to coat. Puree this mixture in a blender or food processor until smooth, then pour into a soup pot. Puree the other half of the squash, adding some stock as necessary if the squash is dry. Add this to the soup pot, and stir to combine.

At this point you will have a thick puree. Add vegetable or chicken stock while stirring until you reach a consistency you prefer. Heat over medium high heat until simmering and allow to simmer for about 7 minutes. Add salt and pepper to taste. Serve immediately. (I like to swirl in a little heavy cream or sour cream to add some richness, but this is optional).

Wednesday, October 6, 2010

Choice Edibles

I did something this past weekend that my mother would not be happy with. I picked and ate wild mushrooms.


Remember when I told you about being instructed not to eat things growing in the front yard such as wild berries and onion grass? Well at least those things we knew were safe to eat (as long as neighborhood animals had not peed on the onion grass as my mom would tell me). But mushrooms, wild mushrooms to be specific, were strictly off limits.
We were not to touch, eat, smell, or look at for too long, any mushroom growing in the yard or woods behind our house. And heaven forbid if my mom saw someone leaning over a pretty little mushroom, itching to pick it… there would be hell to pay. But here in Maine things are different. I am free to eat whatever wild and potentially hazardous foods I want!

The Kennebec Messalonskee Trails organization was hosting a guided mushroom foraging walk along a trail this past Sunday, which was advertised on a small poster inside of a local coffee shop. Researching this further, I found out that the trail was fairly close to home, and that all I had to bring was a brown paper bag and a donation.
I figured this would be a few people who were interested in learning that not all wild mushrooms will kill you – but I was very wrong. There were over 50 people in attendance waiting to be shown the edible fungi of the forest. Which can seem like a good time, but made it very difficult to see what mushrooms our expert was talking about, let alone to try and harvest any yourself. I stayed with the group for a little while, until one woman who had literally run in front scooping up mushrooms and then pushed her way back into the group to get a yay or nay on the edibility of said mushrooms from the expert repeated this process a couple of times. (oh and if the answer was ‘nay’ she would toss the mushrooms back over her shoulder and take off again in search of something else.)
I decided I needed to leave this group, armed with the knowledge of one edible mushroom, and walked along the trail hoping to find something interesting. The path of destruction continued for a good ½ mile, until there were some remaining mushrooms that had not yet been up-rooted, or torn in half to check for viability. This is where I found my puffballs.
Puffballs are round mushrooms that seem to have almost no discernible stem. They can grow to be huge round balls of fungal goodness, although the ones I found were tiny. I was told by the expert that as long as the puffball was completely white on the inside – it was fine to eat. That in fact puffballs are considered to be a “choice edible” meaning not only are they edible but they probably even taste good too.
I must admit though, before picking one, I had a small panic attack. Somewhere my mom knew. She knew I was picking a mushroom – and she would not be happy. And even when I saw the hordes of young children picking everything they saw and tossing it into their brown paper bags, I couldn’t help but shudder.

Placing my fears aside, and armed with my small bounty of puffballs I headed home and was determined to eat every last one of them (of course only if they were completely white inside).
Sautéed Puffballs on Toast
This recipe would work for any kind of mushroom, but preferably ones that are choice edibles.

Puffballs (as many as you can find, or a large one)
Shallot (I used one medium shallot for the amount of puffballs I had – so use your best judgement)
1 Tb butter
½ tsp dried thyme
½ tsp fresh rosemary (or a pinch of dried)
Salt and pepper
Slice of good bread
1 egg

Wash and check the puffballs for edibility, then slice. Place a small frying pan over medium heat and add butter, add sliced shallot(s) and sauté for about one minute. Add mushrooms, thyme, and rosemary and continue to cook until mushrooms are golden and have shrunk in size. Sprinkle with salt and pepper to taste, then remove from pan and set aside.

Toast bread.

In the same pan, cook your egg however you prefer – over easy, scrambled, etc. Place cooked puffball mixture on top of toast, and add egg over the mushrooms. Serve immediately.

Thursday, September 30, 2010

Autumn is for Apples

Apple season was early this year and I wanted to make sure we picked our fill as soon as possible. As a child I had gone apple picking every year and my family tried to find as many apple recipes as humanly possible. From apple lasagna to apple salsa and apple fritters - we have tried almost everything. Although, nothing says Autumn like a warm apple dessert.

As a freshman in college I actually managed to go apple picking and then coerce the dorm RA into letting me use his kitchen to make 4 apple pies and 2 cobblers. But once the smoke detector went off, he kicked me out and of course I had to leave one of the pies with him as restitution.
When I was living in Germany, late September was just about the time when homesickness hit me hard. I needed a boost; something to give me the comforts of home. A friend’s parents were coming to visit him in Rome for Thanksgiving and had invited all of our college friends who were abroad down to a home cooked meal for Thanksgiving. Finding a turkey at local markets in Rome is no easy feat, nor is cooking a Thanksgiving meal for 8 on a European apartment stove. I tried to think of what I could bring from Germany to make that dinner happen a little more easily. It was also my friend’s mother’s birthday and that was the only excuse I needed to make an apple dessert and bring it with me.
Pie crusts are not necessarily my forte, and since I had just bought my German cookbook, I figured I could make an Apfelkuchen. Apfelkuchen is literally Apple Cake, but they tend to resemble more of a pie or crumble rather than what we think of as a cake. So I figured this would fit in nicely with our Thanksgiving abroad theme, assuming it made it down to Rome in once piece.
Just like carrying raw or unprocessed foods into America is frowned upon, apparently the same rules apply within Europe too. In the middle of the night, there was loud knocking on the sleeper car door with the police asking for me. And if any of you know me, I am (1) a very sound sleeper, and (2) terrified at being woken up in the middle of the night. So when one of my fellow travelers did wake me up, I was so shaken I could only speak to the police in German – even though they addressed me in English.
         “Are you Jamie Daggon?”
         “Ja.”
         “You are American, yes?”
         “Ja.” Well, you get the idea. When the policeman asked if I was carrying any foods or produce with me, I told him ‘nein’. In my memory this policeman was wary of my response – most likely because I refused to speak in English, but nevertheless, I got away with it.
The Thanksgiving dinner was a huge comfort and impressive by Italian and American standards. It was certainly one I will never forget, and my friend’s mom to this day still remembers me sneaking her birthday apfelkuchen over borders and through customs for her. If you need a cake that is easily snuck anywhere, I recommend this one.
Apfelkuchen
As adapted from Backen by Marianne Kaltenbach and Friedrich-Wilhelm Ehlert
The crust on this is what sets it apart from other pies or American apple desserts. It has a thick, rich crust that plays well against the apples. I typically prefer a sweet, tart, firm baking apple for this – one that will hold its shape. But when I made this the other day, I used Gingergolds which melt into an applesauce type of texture. It was pleasantly smooth and against the hazelnuts and crust worked really well. So, just use your favorite apples in this and it should turn out pretty well.

The Measurements here are in grams, and I have not converted them as that never really works out well.

For the Crust
200 g flour
100 g butter, at room temperature, cut into small pieces
50 g sugar
1 pinch of salt
Zest of 1 lemon
1 small egg

For the Filling
3 Tb crushed hazelnuts
2 pounds apples, cored, peeled and sliced
Juice of 1 lemon
2 Tb raisins (optional)
1 tsp cinnamon
½ tsp nutmeg
¼ tsp allspice
3 Tb sugar

For the Streusel Topping
100 g butter, at room temperature
150 g sugar
½ Tb cinnamon
1 Tb Vanilla sugar (or 2 tsp sugar and 1 tsp vanilla)
150 g flour

For the crust, place the flour on a clean surface and add butter. Begin to work butter into flour, when you reach pea sized pieces, make a well in the center and add the egg, sugar, salt and lemon zest. Work the egg into the flour mixture and stop when thoroughly incorporated. The dough will still be a bit crumbly. Wrap in plastic and refrigerate at least an hour.

Lay a piece of parchment paper on the bottom of a 9” spring form pan. Preheat the oven to 392° (this is an exact conversion so 200°C). Once the dough has rested, roll it out on a clean surface. Place in the spring form pan, pressing the crust up the sides about ½” an inch. Sprinkle the crushed hazelnuts over the bottom of the crust. Toss the sliced apples with the lemon juice, and then layer in the pan. Pour remaining juice over apples. Sprinkle sugar, raisins (if using) and spices over the apples evenly.

For the streusel topping, combine flour, sugar, and spices together in a medium bowl. Cut in the butter until small clumps form. Sprinkle this topping over the apples. Bake the apfelkuchen for about 35 minutes, until golden brown. You may need to cover the top of the cake with a loose piece of foil to prevent the streusel from turning too brown. Allow to cool about 15 minutes and remove the sides of te spring form pan. Serve with vanilla ice cream or a dollop of whipped cream.