Wednesday, October 27, 2010

It's Shepherd's Pie Time

Mainer’s have a different idea about what Shepherd’s Pie is than what I was accustomed to. And if you tell a Mainer that their version is not what you have typically seen or had before – they will look at you like you have 3 heads, or that you are simply “from away.” Typically the Maine version contains ground beef, corn kernels, and some kind of gravy flavoring, all topped with mashed potato.
I know that the beauty of Shepherd’s Pie is its versatility, but I had always viewed it as a one dish meal; or an easy, cheap, pretty good tasting meal. I was brought up with Shepherd’s Pie being ground beef, mixed frozen veggies, baked in a pie shell and topped with mashed potatoes. You can make this meal for under $10 and that includes buying natural free range beef.
I made Shepherd’s pie for Joe once early on in our relationship. He was blown away. He ate the two pies I made all week for various meals – breakfast, lunch and dinner. He wasn’t so much impressed by my skills at adding frozen vegetables and cooked ground beef into a frozen pie shell and baking it, but by it’s simplicity and inherent comfort.
Shepherd’s Pie traditionally (or so I have read) was chunks of mutton cooked with some root vegetables and topped with more root vegetables. If you happen upon a good Irish pub in the states you may get this. I can’t speak to what the dish is in the British Isles, but in my dreams it is lamb stew with a crust and potatoes. But I think you can really play around with this dish to make it fit your tastes.
Crust or no crust. Frozen mixed vegetable, or fresh organic root vegetables. Instant mashed potatoes or fresh mashed Yukon gold potatoes mixed with celeriac. Or ground beef or natural organic ground lamb. It’s all up to you and your budget. At this time of year when the wind is howling and rain is slamming your windows, it’s nice to have the smell of comfort emanating from your oven.
Shepherd’s Pie
The basic formula is meat + veg + mashed potatoes. Expand upon that as you wish. The pie in these photos is made from the recipe below.

For the Topping
5-6 medium potatoes, peeled and chopped into ½” chunks
½ a medium celeriac, peeled and chopped into ½” chunks
2 Tb butter
¼ c milk (or more)
Salt and pepper to taste

For the Pie
1 frozen deep dish pie shell

1 lb ground lamb
4 small carrots, peeled and diced
1 small onion, diced
2 cloves garlic, minced
1 leek, diced
3 Tb Worcestershire sauce
1 tsp all spice
Salt and pepper to taste
Beef Broth (optional)

Preheat the oven to 375°. Place chopped potatoes and celeriac in a sauce pan of water and boil until fork tender, about 10-12 minutes.

Meanwhile, sauté ground lamb, onions and garlic together in a large pan. Once the onions are translucent and the meat is mostly browned, add the leek and carrots. Stir to combine and continue cooking until the meat is completely cooked through. At this point, you can either drain off most of the fat from your pan, or if you are using a leaner meat, decide if you need to add some beef broth. The meat mixture should be moist but not very wet. We’re looking for saucy here. Then add the Worcestershire sauce and spices, stirring to combine. Taste for seasonings.

Spoon the meat mixture into the frozen pie shell.

Drain the potatoes and celeriac. Mash together with milk and butter, adding salt and pepper as desired.

Dot the top of the pie with mashed vegetables, and smooth to coat the top of the pie evenly.

Place pie on a baking sheet and bake for 20-30 minutes until the mashed potatoes have browned lightly and the crust is cooked.

Let the pie cool for as long as you can stand to wait, then cut and serve.

Thursday, October 21, 2010

In Honor of June Cleaver

My house growing up was full of people and activity, that is, if we were home. Both my parents worked, multiple jobs and they usually took us with them if we weren’t in school. Some of my favorite memories are of having chicken broth out of a vending machine at the YMCA or eating Apple Jacks in the back of my Dad’s Dodge Colt while he delivered newspapers early one morning.
That is not to say that we did not have family dinners. We just had ours a little differently. At a fairly young age, my mom had my sisters and I cooking at least once a week. This included planning the menu, adding it to the grocery list and then preparing and serving it. My go-to meal was frozen raviolis (it still is, I usually have a bag for when I just cannot cook anything that requires thinking). I do remember gathering around a table for meals and trying to get my sister to laugh so hard she shot milk out of her nose. I was on a role for a while until my mom threatened us with some unnamed horrible punishment if Jen’s milk went anywhere but down her throat.
Or a few years later setting the table complete with glasses of milk (I had given up trying to neti-pot my sister with milk by this time) then coming back to find our little dog standing on the table lapping the milk out of everyone’s glasses. We had and still have a lot of good times around the dinner table. And I understand how hard it must have been to ensure we always had some time set aside for family dinners.
Today, I am blessed with a job that lets me get out of work fairly early by normal standards. And when Joe is in season, I have even more time to get dinner on the table. I’m no June Cleaver (my apron has a swear word on it heehee) but I like to have dinner ready for when Joe comes home. Not every day, and I have previously mentioned how after a bad day I may in fact be on the couch in the dark 2 martinis in by the time Joe comes home (hence the frozen raviolis).
Not everyone has this much time to cook dinner, and I always like to look for recipes that can be done quickly and taste good. While visiting my ex-college roommate and her husband this past weekend, I got to thinking about how difficult it can be to prepare something healthy and varying week to week. So Neerali, this one is for you.

Pork Agrodolce
As adapted from Gourmet April 2008 and Cooking Light
This is a quick and dirty way to make agrodocle –but I really like it. Be warned however, it is very strong on the vinegar flavor, so if you don’t like that, this recipe is not for you. I typically make this sauce for pan seared salmon, but the store was completely out of wild salmon. If you want to use salmon follow the * for directions below. This pork version takes a little longer but the hands-on time is about the same.

For the Pork
1 pork tenderloin
Olive Oil
Salt
Pepper
Fresh (or dried sage) optional
Dried mustard (or fresh) optional

Agrodolce
1 large red onion, cut into 8 wedges (if it is a gigantic onion cut it into 16 wedges)
2 Tb. Olive oil
2/3 c. balsamic vinegar
1 tsp. sugar
½ tsp. salt
1 Tb butter

Preheat the oven to 400°. Rub the pork with olive oil and spices. Place pork on a foiled baking sheet or roasting pan and cook for about 20-30 minutes, until cooked all the way through. (if you have a meat thermometer, the pork should register about 140° or longer if you want it less pink)

Once the pork has finished cooking, turn off the oven and let it rest. While the pork is resting, cook the agrodolce. Heat the olive oil in a sauté pan, and add red onion, some of your wedges will fall apart, but don’t worry. Cook onion for about 6-8 minutes until their color has lessened and they start to get a little brown. Then add sugar, salt and vinegar. Cook for another 5-7 minutes until the vinegar is thick and syrupy. Add the butter to the sauce and stir until it is blended into the sauce. Spoon agrodolce onto plate and serve with sliced pork over top. This can be served with your favorite vegetable (roast broccoli) and potatoes or egg noodles (I have a weakness for egg noodles).

*For Salmon, take wild salmon and slice filets into single serve portions. Sprinkle with salt and pepper. Heat olive oil in a pan, and cook salmon skin side UP for 8-12 minutes, until a nice golden crust forms on the salmon. Flip and cook for another few minutes. This version is much more quick then the pork, but both are fairly easy.

Thursday, October 14, 2010

Recovery Sunday Soup

This past weekend was filled with weddings, being as it was 10-10-10 and all. Although Joe and I did not go to a wedding on that auspicious day, we did attend a friends’ wedding that was lovely. Since Joe was in this wedding, we had some responsibilities and duties, for the groomsmen that of course included imbibing before the ceremony. And for me, it meant trying to keep my new heels on for most of the night.

One of the things I love about weddings (besides the glorious celebration of love of course) is the food. Cocktail hour is a big highlight for me, and if you remember my love of all things small – you know how crazed I may have gotten around tiny hamburgers and small bites of tuna tartar. Plus during cocktail hour you can get one or two martinis before receiving disapproving looks from bartenders, and having to switch to wine.
Without going into too much detail, there is a game that Joe’s friends play at weddings, that encourages a very good time by all. Basically you draw a name of a fellow wedding guest and if the person you drew, drinks too much and makes a fool of him/herself you win the prize. Granted no one wants to make a fool of them self, or at least only a select few will admit to wanting that outcome for themselves, but these things have a tendency to sneak up on you.

And if you are hoping that this story will lead to me regaling you with tale of public embarrassment by myself or Joe, sadly I will not deliver. What this story will lead to is the need to recover the day after a wedding. Typically Joe and I need to drive back to Maine the day after any celebration, which is one of the worst tasks known to man. Traffic on the Mass Pike does not mix well with a queasy stomach and a pounding headache –let me tell you.
But this time, we decided to spend an extra day visiting friends, who had also participated in a wedding the day before. A sorry sight we all were, eating takeout and watching football through half open eyes. We decided something good for us, nutritious and filling, comforting and cleansing was the way to recovery. A soup. Well, vegetables to be exact. After slowly destroying livers, it was necessary to balance out the equation with the restorative powers of vegetables.

Nothing says hearty, vegetable soup like a butternut squash soup. I like to make this fairly frequently during the winter, and it is very easy. It can be completely vegan and gluten free yet pleasing to even the most die-hard of carnivores. However, on this particular weekend, there were no Butternut squashes at the WholeFoods in Montclair. Which called for a plan B – anything But Butternut Soup.

Anything But Butternut Soup
You can make a “butternut-esque” style soup with any of your orange fleshed winter squashes. The most sweet and tender the squash when cooked, the better. We used a combination of Acorn, Delicata and Ambercup. I like the flavor best when you roast the squash first, then puree it -you keep all the best flavors of the squash intact.

3 c. cubed assorted yellow or orange fleshed winter squash
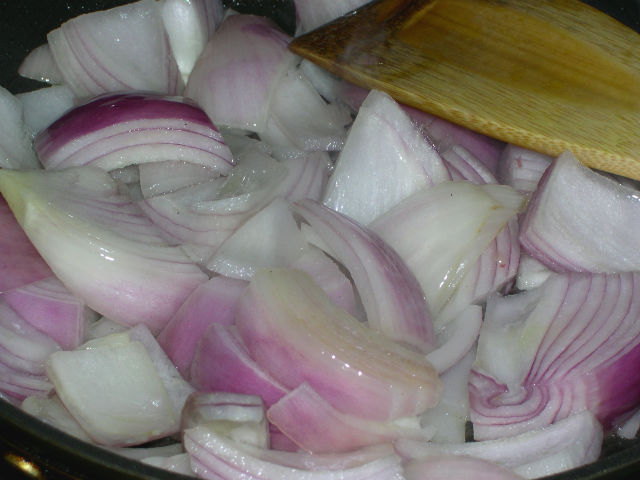
½ small onion, diced
1 Tb fresh thyme
Pinch of cayenne pepper
2 Tb olive oil, divided
12 oz. vegetable or chicken stock (one carton)
Salt and pepper to taste

Cut off the skin of the squash, scoop out the seeds and chop into 1”cubes. Toss with some salt, pepper and 1 Tb of olive oil, then spread onto a baking sheet and roast at 375° until tender – about 30-45 minutes.

Next heat 1 Tb olive oil in a sauté pan, add onions, thyme, and cayenne pepper cook until onions are soft and translucent, about 7- 10 minutes. One the squash is cooked, add half to the sauté pan with the onions, stirring to coat. Puree this mixture in a blender or food processor until smooth, then pour into a soup pot. Puree the other half of the squash, adding some stock as necessary if the squash is dry. Add this to the soup pot, and stir to combine.

At this point you will have a thick puree. Add vegetable or chicken stock while stirring until you reach a consistency you prefer. Heat over medium high heat until simmering and allow to simmer for about 7 minutes. Add salt and pepper to taste. Serve immediately. (I like to swirl in a little heavy cream or sour cream to add some richness, but this is optional).

Wednesday, October 6, 2010

Choice Edibles

I did something this past weekend that my mother would not be happy with. I picked and ate wild mushrooms.


Remember when I told you about being instructed not to eat things growing in the front yard such as wild berries and onion grass? Well at least those things we knew were safe to eat (as long as neighborhood animals had not peed on the onion grass as my mom would tell me). But mushrooms, wild mushrooms to be specific, were strictly off limits.
We were not to touch, eat, smell, or look at for too long, any mushroom growing in the yard or woods behind our house. And heaven forbid if my mom saw someone leaning over a pretty little mushroom, itching to pick it… there would be hell to pay. But here in Maine things are different. I am free to eat whatever wild and potentially hazardous foods I want!

The Kennebec Messalonskee Trails organization was hosting a guided mushroom foraging walk along a trail this past Sunday, which was advertised on a small poster inside of a local coffee shop. Researching this further, I found out that the trail was fairly close to home, and that all I had to bring was a brown paper bag and a donation.
I figured this would be a few people who were interested in learning that not all wild mushrooms will kill you – but I was very wrong. There were over 50 people in attendance waiting to be shown the edible fungi of the forest. Which can seem like a good time, but made it very difficult to see what mushrooms our expert was talking about, let alone to try and harvest any yourself. I stayed with the group for a little while, until one woman who had literally run in front scooping up mushrooms and then pushed her way back into the group to get a yay or nay on the edibility of said mushrooms from the expert repeated this process a couple of times. (oh and if the answer was ‘nay’ she would toss the mushrooms back over her shoulder and take off again in search of something else.)
I decided I needed to leave this group, armed with the knowledge of one edible mushroom, and walked along the trail hoping to find something interesting. The path of destruction continued for a good ½ mile, until there were some remaining mushrooms that had not yet been up-rooted, or torn in half to check for viability. This is where I found my puffballs.
Puffballs are round mushrooms that seem to have almost no discernible stem. They can grow to be huge round balls of fungal goodness, although the ones I found were tiny. I was told by the expert that as long as the puffball was completely white on the inside – it was fine to eat. That in fact puffballs are considered to be a “choice edible” meaning not only are they edible but they probably even taste good too.
I must admit though, before picking one, I had a small panic attack. Somewhere my mom knew. She knew I was picking a mushroom – and she would not be happy. And even when I saw the hordes of young children picking everything they saw and tossing it into their brown paper bags, I couldn’t help but shudder.

Placing my fears aside, and armed with my small bounty of puffballs I headed home and was determined to eat every last one of them (of course only if they were completely white inside).
Sautéed Puffballs on Toast
This recipe would work for any kind of mushroom, but preferably ones that are choice edibles.

Puffballs (as many as you can find, or a large one)
Shallot (I used one medium shallot for the amount of puffballs I had – so use your best judgement)
1 Tb butter
½ tsp dried thyme
½ tsp fresh rosemary (or a pinch of dried)
Salt and pepper
Slice of good bread
1 egg

Wash and check the puffballs for edibility, then slice. Place a small frying pan over medium heat and add butter, add sliced shallot(s) and sauté for about one minute. Add mushrooms, thyme, and rosemary and continue to cook until mushrooms are golden and have shrunk in size. Sprinkle with salt and pepper to taste, then remove from pan and set aside.

Toast bread.

In the same pan, cook your egg however you prefer – over easy, scrambled, etc. Place cooked puffball mixture on top of toast, and add egg over the mushrooms. Serve immediately.