I love leeks. Love. I even have a few planted in a garden box in my backyard, although I fear they will not turn into anything more than the spindly shoots of green they are currently. It’s been hard to find nice leeks in the places I have lived so far in my life. Here in Maine it has been easier, but they tend to be rather pricey. If they were less expensive I would put them in everything. But as is, I must restrain myself and use them sparingly and only when a truly great recipe calls for them.
There is of course potato leek soup – of which I make a pretty good version, but it is far too hot outside to mention the words ‘hot and hearty soup’ right now. And a leek tart is also subtle and delicious that more pieces of it then necessary are usually consumed on my part. But there is a recipe that uses as many leeks as you have, and satisfies that leek flavor craving without making you feel guilty about ingesting too much.
Usually, vegetable side dishes are always a little boring, I think. It’s hard to incorporate variety sometimes onto the plate for dinner. It’s easy to get stuck in the rut of meat, carb, veg and the only way to spruce it up is to change up the carb or add a sauce to the meat. Of course now that there are tons of vegetables begging to be picked from the ground and the farmer’s market, but even still it’s nice to add a little variety to cooking methods now and again.
This recipe is a great vegetable side dish, and is very easy and fairly healthy to make. As long as you like a little vinegar flavor, you will love this recipe. I know I just shared with you a German potato salad recipe that is heavy on the red wine vinegar –but this one, I promise, is not. It really lets the leeks and carrots shine and I think the whole thing tastes even better the next day for lunch.
Leeks and Carrots
as Adapted from Gourmet May 2008
This recipe can be multiplied easily. But this is just enough to make a side for 1 person. If you are making a larger batch, increase the cooking times as well. With the smaller, younger carrots, you won’t need to cook them that long at all.
1 medium leek (white and pale green parts only)
1 Tb unsalted butter
Salt and Pepper
3 medium carrots, cut diagonally into ¼ inch wide pieces
1/2 c water
2 Tb red-wine vinegar
Halve leeks lengthwise, rinse, and cut into ½ inch pieces
Sauté leeks in butter with a dash salt and pepper in a skillet over medium-high heat until softened, 3 to 4 minutes.
Stir in carrots, water, and vinegar. Cook, covered, over medium-high heat until carrots are tender, 12 to 18 minutes.
Boil, uncovered, until liquid has mostly evaporated, 1 to 2 minutes.
Friday, July 16, 2010
Friday, July 9, 2010
German Potato Salad
Since the title of this blog is German, I thought it would be nice if I shared another German recipe. Although, this one isn’t as authentic perhaps as others I will or have shared here. This is a Daggon family recipe. There were always a few German recipes that my mom would make for us throughout the year and this was always a favorite. You can make it all in one pot, and then keep it warm in the crock-pot all day, or you can put it in the fridge and eat it cold whenever the mood strikes you.
I have made this recipe before on several occasions, not to mention for dinner fairly regularly. It usually goes over well, as long as the diners like vinegar. The original recipe is from my grandmother’s 1968 edition of the Better Homes and Gardens “New” Cookbook, which I inherited after my grandmother passed away.
I love that cookbook. The pictures in it are startlingly unappetizing, but there is something about it that always makes me want to produce a jello mold or host the perfect bridge party. I like that all my standard questions regarding cooking can be answered easily in that book. How to bone a chicken, what table settings are appropriate for a dinner party, what fruit punch will dazzle your guests. The recipes are tested and true, and I find, are easily adaptable to today’s palate.
For the German Potato Salad, you can increase the quantity or decrease it to fit the number of servings you need. It doubles, or quadruples nicely – especially when you are bringing 40 pounds of it to a pot-luck for all the employees at the bakery you work in. The one-potted-ness of it works well too, when the thought of washing more dishes in your already full sink turns your stomach.
So even though the heat here this past week has made me want to eat nothing but ice cream for dinner, I managed to sweat through making this meal. And to be honest it doesn’t even take that long to pull together. You can always let the potatoes boil and leave the room to splash cold water on yourself. And the smell of bacon and onions can make you forget that your kitchen fan doesn’t work.
German Potato Salad
As adapted from the 1968 edition of Better Homes and Gardens New Cookbook
And Jill Daggon
I used tri-color potatoes I had left over from making a patriotic potato salad for the 4th, but if you are using blue potatoes, be careful, as they do tend to fall apart more easily than their “stars and stripes” counterparts.
6 c. potatoes, cut into bite sized pieces
½ lb bacon, diced
1 medium onion, diced
1 lb kielbasa, sliced
2 Tb sugar
1 ½ tsp celery seed
1 tsp caraway seed
1 tsp salt
2 Tb flour
1 c. red wine vinegar
½ c. water
Pepper to taste
Boil the potatoes in salted water, until they are fork tender, about 15 minutes (depending on the size of your pieces). Then drain and run cold water over the potatoes to slow the cooking.
In the now empty potato pot, place diced bacon pieces and begin to render out the fat. When the bacon has rendered most of its fat, but before the pieces are crisp, add the onion and cook until translucent, about 5 minutes. Add the sliced kielbasa, celery seed, caraway seed and salt and stir until everything is evenly coated. Add the flour and cook, stirring constantly for about 5 minutes. You should have no more bacon grease on the bottom of your pot, if you do - add more flour. Once the flour has browned slightly, add the vinegar and water and stir vigorously to work in all the flour bits. Bring this mixture up to a boil to thicken, and simmer until the sauce will coat the back of a spoon.
Remove the pot from the heat, and add back in your potatoes, stirring to coat. Add salt and pepper as needed. Serve immediately, or let sit and refrigerate for later.
I have made this recipe before on several occasions, not to mention for dinner fairly regularly. It usually goes over well, as long as the diners like vinegar. The original recipe is from my grandmother’s 1968 edition of the Better Homes and Gardens “New” Cookbook, which I inherited after my grandmother passed away.
I love that cookbook. The pictures in it are startlingly unappetizing, but there is something about it that always makes me want to produce a jello mold or host the perfect bridge party. I like that all my standard questions regarding cooking can be answered easily in that book. How to bone a chicken, what table settings are appropriate for a dinner party, what fruit punch will dazzle your guests. The recipes are tested and true, and I find, are easily adaptable to today’s palate.
For the German Potato Salad, you can increase the quantity or decrease it to fit the number of servings you need. It doubles, or quadruples nicely – especially when you are bringing 40 pounds of it to a pot-luck for all the employees at the bakery you work in. The one-potted-ness of it works well too, when the thought of washing more dishes in your already full sink turns your stomach.
So even though the heat here this past week has made me want to eat nothing but ice cream for dinner, I managed to sweat through making this meal. And to be honest it doesn’t even take that long to pull together. You can always let the potatoes boil and leave the room to splash cold water on yourself. And the smell of bacon and onions can make you forget that your kitchen fan doesn’t work.
German Potato Salad
As adapted from the 1968 edition of Better Homes and Gardens New Cookbook
And Jill Daggon
I used tri-color potatoes I had left over from making a patriotic potato salad for the 4th, but if you are using blue potatoes, be careful, as they do tend to fall apart more easily than their “stars and stripes” counterparts.
6 c. potatoes, cut into bite sized pieces
½ lb bacon, diced
1 medium onion, diced
1 lb kielbasa, sliced
2 Tb sugar
1 ½ tsp celery seed
1 tsp caraway seed
1 tsp salt
2 Tb flour
1 c. red wine vinegar
½ c. water
Pepper to taste
Boil the potatoes in salted water, until they are fork tender, about 15 minutes (depending on the size of your pieces). Then drain and run cold water over the potatoes to slow the cooking.
In the now empty potato pot, place diced bacon pieces and begin to render out the fat. When the bacon has rendered most of its fat, but before the pieces are crisp, add the onion and cook until translucent, about 5 minutes. Add the sliced kielbasa, celery seed, caraway seed and salt and stir until everything is evenly coated. Add the flour and cook, stirring constantly for about 5 minutes. You should have no more bacon grease on the bottom of your pot, if you do - add more flour. Once the flour has browned slightly, add the vinegar and water and stir vigorously to work in all the flour bits. Bring this mixture up to a boil to thicken, and simmer until the sauce will coat the back of a spoon.
Remove the pot from the heat, and add back in your potatoes, stirring to coat. Add salt and pepper as needed. Serve immediately, or let sit and refrigerate for later.
Thursday, July 1, 2010
Sensational Scapes
Last year was the first time I had ever seen or heard of, for that matter, garlic scapes. I had made a pact with myself to buy and eat any new item at the farmer’s market that I had not tried before. So far, this has only proven to be beneficial to me. Well, last year I saw garlic scapes as one of the first items to be stocked once the market opened for the spring. Here in Maine, the growing season is a little slower than the rest of the country, so when the market opens in May, these little beauties are first to arrive, alongside radishes and baby greens.
Garlic scapes are the flowering stalk of a growing bulb of garlic. In these pictures you can see the light green bulbous part of the plant - that is where the flower will open if left to continue growing. If the flower does open, the garlic bulb will not continue to mature, and so the stem is neatly plucked off the plant after the top of it has curled. The exciting thing is though, that this piece is almost entirely edible. It can get a little woody towards the bottom of the stalk, but as far as I know, the blades of grass-like protrusions, stem, bulb and curl, are all edible.
The taste is like a vegetal raw garlic flavor, so a “green garlic’. It can be very pungent, as I recently learned after microwaving the leftover pasta and scape pesto at work today. But garlic never seems to bother me. I can’t smell it on other people or myself. Which may or may not be a good thing. Don’t get me wrong, I know if I have garlic breath, but I have never met anyone who seemed to exude garlic. In my mind, you can (almost) never eat too much garlic.
I use the 'almost' because I do believe that I once crossed that threshold. On a trip to San Francisco there was a garlic themed restaurant that my mother and I went to. It’s a little kitschy, but come on, who would say no to garlic scented Chardonnay? You mean you would say no to garlic Chardonnay? Hmmmm, perhaps I should have as well. But I am not one to pass up odd food/drink options. Without giving you all of the gory details, I realized I had crossed the garlic line, when that night, asleep, face down in the bed; I woke myself up from my own stinky burp. Yes that’s right a stinky burp woke me up. I’m a little ashamed, and admitting it here to you is a little frightening. At least I learned what my limits are when it comes to garlic.
This pesto is pretty strong, but can be cut with more cheese, olive oil and lemon juice if desired. I like the addition of lemon juice because you do need to take the biting edge off the raw garlic flavor. Feel free to toss this with pasta or spread on toast like bruschetta; just don’t pair it with garlic Chardonnay.
Garlic Scape Pesto
As seen in a myriad of recipes online
2 c garlic scape pieces, about ½” long (about ½ a pound)
1 c. grated Parmesan cheese
Juice of ½ a lemon
Salt and pepper to taste
Olive oil as needed
Combine garlic scapes, Parmesan, lemon juice salt and pepper in a food processor and pulse until combined. You may have to scrape down the sides to ensure that all the garlic scape pieces have met with the blades. Once the mixture has been chopped roughly, turn on the food processor and slowly drizzle in the olive oil, until a paste forms. You can make your pesto smoother, should you want to, with the addition of more olive oil.
Garlic scapes are the flowering stalk of a growing bulb of garlic. In these pictures you can see the light green bulbous part of the plant - that is where the flower will open if left to continue growing. If the flower does open, the garlic bulb will not continue to mature, and so the stem is neatly plucked off the plant after the top of it has curled. The exciting thing is though, that this piece is almost entirely edible. It can get a little woody towards the bottom of the stalk, but as far as I know, the blades of grass-like protrusions, stem, bulb and curl, are all edible.
The taste is like a vegetal raw garlic flavor, so a “green garlic’. It can be very pungent, as I recently learned after microwaving the leftover pasta and scape pesto at work today. But garlic never seems to bother me. I can’t smell it on other people or myself. Which may or may not be a good thing. Don’t get me wrong, I know if I have garlic breath, but I have never met anyone who seemed to exude garlic. In my mind, you can (almost) never eat too much garlic.
I use the 'almost' because I do believe that I once crossed that threshold. On a trip to San Francisco there was a garlic themed restaurant that my mother and I went to. It’s a little kitschy, but come on, who would say no to garlic scented Chardonnay? You mean you would say no to garlic Chardonnay? Hmmmm, perhaps I should have as well. But I am not one to pass up odd food/drink options. Without giving you all of the gory details, I realized I had crossed the garlic line, when that night, asleep, face down in the bed; I woke myself up from my own stinky burp. Yes that’s right a stinky burp woke me up. I’m a little ashamed, and admitting it here to you is a little frightening. At least I learned what my limits are when it comes to garlic.
This pesto is pretty strong, but can be cut with more cheese, olive oil and lemon juice if desired. I like the addition of lemon juice because you do need to take the biting edge off the raw garlic flavor. Feel free to toss this with pasta or spread on toast like bruschetta; just don’t pair it with garlic Chardonnay.
Garlic Scape Pesto
As seen in a myriad of recipes online
2 c garlic scape pieces, about ½” long (about ½ a pound)
1 c. grated Parmesan cheese
Juice of ½ a lemon
Salt and pepper to taste
Olive oil as needed
Combine garlic scapes, Parmesan, lemon juice salt and pepper in a food processor and pulse until combined. You may have to scrape down the sides to ensure that all the garlic scape pieces have met with the blades. Once the mixture has been chopped roughly, turn on the food processor and slowly drizzle in the olive oil, until a paste forms. You can make your pesto smoother, should you want to, with the addition of more olive oil.
Thursday, June 24, 2010
Strawberry Obsession
In my family we didn’t can. My grandmother took convenience as a mark of progress and boy did we highlight these convenience items at all family gatherings. (Can anyone say canned ham with canned pineapple rings – and of course crescent rolls?) That is not to say we ate TV dinners or shied away from hours spent in a kitchen making a meal look just perfect. It’s just that we never spent time laying up a store for winter, or practicing patience over home spun taffy. There were too many hours to be spent in a pool, or ocean, or if you were with my grandmother; shopping.
But as I have gotten a little older and moved away, I have become enchanted (obsessed?) with producing foods I once thought only existed in the harshly lit supermarket isle. During my sophomore year of college I went through over 20 pounds of flour in bread-making experiments. And experiments they were, as my roommate can attest to. She grudgingly choked down more than one slice of 100% buckwheat brick loaf. Although 20 pounds doesn’t seem like a lot, it was in a half sized oven in between classes and other college antics (I mean studying). But since then, my bread and other “pioneer skills” have improved.
Last year I went strawberry picking with a friend in the middle of June. The weather leading up to that day had been consistently rainy until the designated strawberry day when the sun came out and ripened those little strawberries. This combination seems to make the best strawberries in the entire world. That’s not an exaggeration by the way, just the truth. There were no white hulls on those strawberries and the color of them was a deep blood-like maroon. I’m not trying to cash in on vampire imagery, but these delicate little things burst with juice and flavor unlike any other strawberry I have ever had, picked or store bought.
Well, needless to say that this year, I was so excited to pick strawberries I talked about it for approximately 11 months and 3 weeks. (The strawberry season came about 1 week early this year). This time I told myself I would get a metric ton of strawberries from which I could make strawberry jam, frozen berries, pies and of course sliced strawberries over vanilla ice cream. This last one is a highly recommended method, if you can let the strawberries sit in the sun to warm themselves, then slice them straight onto ice cream….oops I started to drool a bit on the keyboard.
But I digress; the real point of this is to talk about the jam that I made. Apparently making strawberry jam is a kind of expected chore here in Maine. Everyone has a suggestion about canning, preserving, pectin and freezing. But this recipe is phenomenal. There’s no pectin, no “jelly” of any kind. It’s a deep, rich, intense strawberry flavor; that if you can stand it, will take you half of a day to make.
Strawberry Jam
Adapted from Orangette
1 kilogram strawberries, washed (2.2 pounds)
½ kilogram sugar (1 pound)
Juice of ½ lemon
Hull and slice the strawberries into large chunks. Don’t worry about making even slices, as they will cook down to just a mash. Toss strawberries into a large heavy bottom pot, stir in sugar and lemon juice. Let macerate at room temperature for 2 hours.
After 2 hours, you will have a large pot of strawberry soup. Place the pot on medium heat and bring to a slow boil. A light, greyish-brown foam will form as the strawberries cook, skim this off and discard it. After about 15-20 minutes there won’t be as much foam. Continue to cook, stirring occasionally for about 2 hours. You can begin to prepare the jars while the jam is cooking. The mixture should reduce by 2/3. At this point the strawberries should be mostly broken down with a few large chunks still visible, and the jam should coat the back of a spoon. If it looks nice and thick (and you kitchen smells like strawberries) then you can probably start canning.
Wash 6 clean 4oz. jelly jars, lids and rings in very hot soapy water. Let air dry on a clean dish rack or kitchen towel. Once dry, bake the glass jars (not the metal pieces) in a 250°F oven for at least 20 minutes. After about 20-30 minutes, I usually shut off the oven, but leave the jars in there.
Once the jam is set, carefully remove the hot glass jars from the oven. Spoon the jam into the jars until it reaches about ¼ of an inch from the top. Wipe away any drips on the rims of the jars with a clean, dry paper towel. Place the metal lids on the jars and lightly screw on rings. Place the jars in a pot of water so that the water comes up at least to the bottom of the metal rings. Bring water to a boil, and boil jars for at least 15 minutes. You will hear a lot of rattling if you don’t have a canning basket, but not to worry, I haven’t had a jar break yet. You will also hear some of the jars “pop” as the seal is formed. After 15 minutes, turn off the stove, and let the jars sit for another minute. Carefully remove jars from pot with tongs. Lightly press down on the tops of all your jars to make sure the seal has formed, and tighten the rings. Let cool enough to handle, then label and store. Jars can be kept on a shelf somewhere for about a year, but once you try this jam, it might not last that long.
But as I have gotten a little older and moved away, I have become enchanted (obsessed?) with producing foods I once thought only existed in the harshly lit supermarket isle. During my sophomore year of college I went through over 20 pounds of flour in bread-making experiments. And experiments they were, as my roommate can attest to. She grudgingly choked down more than one slice of 100% buckwheat brick loaf. Although 20 pounds doesn’t seem like a lot, it was in a half sized oven in between classes and other college antics (I mean studying). But since then, my bread and other “pioneer skills” have improved.
Last year I went strawberry picking with a friend in the middle of June. The weather leading up to that day had been consistently rainy until the designated strawberry day when the sun came out and ripened those little strawberries. This combination seems to make the best strawberries in the entire world. That’s not an exaggeration by the way, just the truth. There were no white hulls on those strawberries and the color of them was a deep blood-like maroon. I’m not trying to cash in on vampire imagery, but these delicate little things burst with juice and flavor unlike any other strawberry I have ever had, picked or store bought.
Well, needless to say that this year, I was so excited to pick strawberries I talked about it for approximately 11 months and 3 weeks. (The strawberry season came about 1 week early this year). This time I told myself I would get a metric ton of strawberries from which I could make strawberry jam, frozen berries, pies and of course sliced strawberries over vanilla ice cream. This last one is a highly recommended method, if you can let the strawberries sit in the sun to warm themselves, then slice them straight onto ice cream….oops I started to drool a bit on the keyboard.
But I digress; the real point of this is to talk about the jam that I made. Apparently making strawberry jam is a kind of expected chore here in Maine. Everyone has a suggestion about canning, preserving, pectin and freezing. But this recipe is phenomenal. There’s no pectin, no “jelly” of any kind. It’s a deep, rich, intense strawberry flavor; that if you can stand it, will take you half of a day to make.
Strawberry Jam
Adapted from Orangette
1 kilogram strawberries, washed (2.2 pounds)
½ kilogram sugar (1 pound)
Juice of ½ lemon
Hull and slice the strawberries into large chunks. Don’t worry about making even slices, as they will cook down to just a mash. Toss strawberries into a large heavy bottom pot, stir in sugar and lemon juice. Let macerate at room temperature for 2 hours.
After 2 hours, you will have a large pot of strawberry soup. Place the pot on medium heat and bring to a slow boil. A light, greyish-brown foam will form as the strawberries cook, skim this off and discard it. After about 15-20 minutes there won’t be as much foam. Continue to cook, stirring occasionally for about 2 hours. You can begin to prepare the jars while the jam is cooking. The mixture should reduce by 2/3. At this point the strawberries should be mostly broken down with a few large chunks still visible, and the jam should coat the back of a spoon. If it looks nice and thick (and you kitchen smells like strawberries) then you can probably start canning.
Wash 6 clean 4oz. jelly jars, lids and rings in very hot soapy water. Let air dry on a clean dish rack or kitchen towel. Once dry, bake the glass jars (not the metal pieces) in a 250°F oven for at least 20 minutes. After about 20-30 minutes, I usually shut off the oven, but leave the jars in there.
Once the jam is set, carefully remove the hot glass jars from the oven. Spoon the jam into the jars until it reaches about ¼ of an inch from the top. Wipe away any drips on the rims of the jars with a clean, dry paper towel. Place the metal lids on the jars and lightly screw on rings. Place the jars in a pot of water so that the water comes up at least to the bottom of the metal rings. Bring water to a boil, and boil jars for at least 15 minutes. You will hear a lot of rattling if you don’t have a canning basket, but not to worry, I haven’t had a jar break yet. You will also hear some of the jars “pop” as the seal is formed. After 15 minutes, turn off the stove, and let the jars sit for another minute. Carefully remove jars from pot with tongs. Lightly press down on the tops of all your jars to make sure the seal has formed, and tighten the rings. Let cool enough to handle, then label and store. Jars can be kept on a shelf somewhere for about a year, but once you try this jam, it might not last that long.
Wednesday, June 16, 2010
Phyllo Fears
I love refrigerator crescent rolls. It’s a little shameful, I know. But they were that special occasion side dish we had as a family. And I always knew I had stayed in the kitchen during holidays for long enough, when the honor of rolling the crescents was bestowed upon me. Even if I was scolded once for not making them in the appropriate crescent in shape.
I still tend to use crescent roll dough every now and then, like when a particular boyfriend’s crew team invites parents and guests to early morning exposition rows. They make wonderful savory filled croissants, and there is nothing like catering to hungry, college age, male, athletes to bolster your cooking ego.
But as I have progressed in cooking ability I feel as though I need to move up the ranks of premade pastry dough. So the next logical step of course is frozen puff pastry. I will literally wrap anything in puff pastry; beef, salmon, fruit, cheese, chocolate – anything. Then, after conquering puff pastry the only move up this dough ladder is on to phyllo dough.
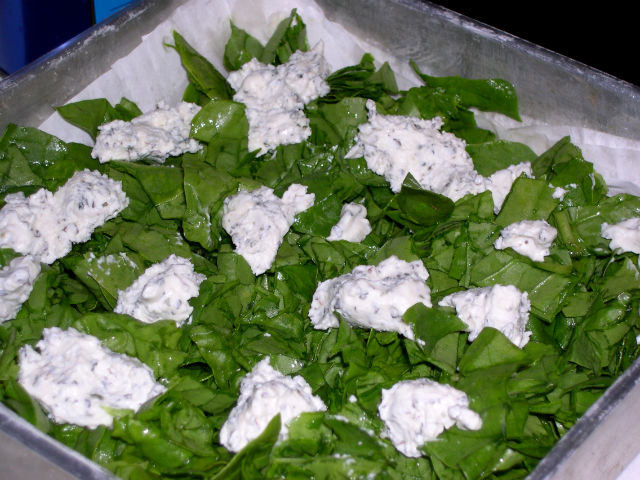
I did have a traumatic experience with phyllo once and I am always a little hesitant to use it on my own. It dries out, it crumbles and tears; it is altogether a frightening piece of food. But this weekend when a friend invited me over and I couldn’t muster the energy to go to the grocery store, I opened the freezer and saw the phyllo. I had also bought some fresh local spinach and local goat cheese with basil and garlic. Obviously, I needed to make spanikopita.
I have made it before but with puff pastry and in triangle form. I thought I would make a pan of spanikopita, so I took a deep breath and defrosted the phyllo. It actually turned out better than I expected, so I thought I would share it with you.
Spanikopita
You can use frozen spinach, but fresh will cook down in the oven. Although I am sure that arugula or another bitter green would work well also.
½ package phyllo dough (there are usually 2 rolls of dough in one box), defrosted to room temperature
½ cup butter, melted
3 cups fresh spinach, washed and roughly chopped
8 ounces herbed goat cheese (you can use feta)
Salt and pepper
Brush the bottom of an 8” square pan with butter, and preheat oven to 350°F.
Unwrap the phyllo and place on top of a damp (but not too wet) clean kitchen towel. Cover the phyllo with another clean, damp kitchen towel. Place one sheet of phyllo at a time into the bottom of your pan, brushing all over with melted butter. Once you pull one sheet off the stack, be sure to replace the damp towel so the dough doesn’t dry out. Keep layering sheets of phyllo and butter until you have about 12 lining the pan. The dough will extend up over the edges, just be sure to brush them with butter so they stick together.
Then, place some dollops of cheese into the pan, using about half the cheese – they will spread out while cooking. Cover with spinach and sprinkle with salt and pepper. (You can add a little nutmeg if you want). Top the spinach with the remaining cheese. Brush a little butter over the cheese and spinach, and start placing sheets of phyllo on top. Layer another 10-12 sheets of phyllo and butter in the pan.
Brush the top sheet of phyllo and sprinkle with a little salt. Slice the entire pan into squares or triangles, prior to baking, being careful not to tear the phyllo. Bake for about 35-40 minutes, or until the mixture has sunk down and is golden brown. Let cool, slice and remove from pan.
I still tend to use crescent roll dough every now and then, like when a particular boyfriend’s crew team invites parents and guests to early morning exposition rows. They make wonderful savory filled croissants, and there is nothing like catering to hungry, college age, male, athletes to bolster your cooking ego.
But as I have progressed in cooking ability I feel as though I need to move up the ranks of premade pastry dough. So the next logical step of course is frozen puff pastry. I will literally wrap anything in puff pastry; beef, salmon, fruit, cheese, chocolate – anything. Then, after conquering puff pastry the only move up this dough ladder is on to phyllo dough.
I did have a traumatic experience with phyllo once and I am always a little hesitant to use it on my own. It dries out, it crumbles and tears; it is altogether a frightening piece of food. But this weekend when a friend invited me over and I couldn’t muster the energy to go to the grocery store, I opened the freezer and saw the phyllo. I had also bought some fresh local spinach and local goat cheese with basil and garlic. Obviously, I needed to make spanikopita.
I have made it before but with puff pastry and in triangle form. I thought I would make a pan of spanikopita, so I took a deep breath and defrosted the phyllo. It actually turned out better than I expected, so I thought I would share it with you.
Spanikopita
You can use frozen spinach, but fresh will cook down in the oven. Although I am sure that arugula or another bitter green would work well also.
½ package phyllo dough (there are usually 2 rolls of dough in one box), defrosted to room temperature
½ cup butter, melted
3 cups fresh spinach, washed and roughly chopped
8 ounces herbed goat cheese (you can use feta)
Salt and pepper
Brush the bottom of an 8” square pan with butter, and preheat oven to 350°F.
Unwrap the phyllo and place on top of a damp (but not too wet) clean kitchen towel. Cover the phyllo with another clean, damp kitchen towel. Place one sheet of phyllo at a time into the bottom of your pan, brushing all over with melted butter. Once you pull one sheet off the stack, be sure to replace the damp towel so the dough doesn’t dry out. Keep layering sheets of phyllo and butter until you have about 12 lining the pan. The dough will extend up over the edges, just be sure to brush them with butter so they stick together.
Then, place some dollops of cheese into the pan, using about half the cheese – they will spread out while cooking. Cover with spinach and sprinkle with salt and pepper. (You can add a little nutmeg if you want). Top the spinach with the remaining cheese. Brush a little butter over the cheese and spinach, and start placing sheets of phyllo on top. Layer another 10-12 sheets of phyllo and butter in the pan.
Brush the top sheet of phyllo and sprinkle with a little salt. Slice the entire pan into squares or triangles, prior to baking, being careful not to tear the phyllo. Bake for about 35-40 minutes, or until the mixture has sunk down and is golden brown. Let cool, slice and remove from pan.
Wednesday, June 9, 2010
Perfectly A-Peas-ing
This year I have become strangely obsessed with spring produce. It might be the two tiny garden boxes in my backyard that I tend to “harvest” things from well before they are actually ready to be picked, or it may be the fact that there seems to be more actual local produce to enjoy this year. Perhaps I am just noticing it more, but there are a few stores around town, as well as the farmer’s market that all seem to be carrying a host of new bright green veggies waiting for me.
The one thing I had always wanted to try was fresh shelled peas. It coincides with my early 20th century fantasy about sitting on a porch shelling peas – I probably read at least 20 books growing up where that scenario took place. And finally, this weekend I got my wish (kind of). It wasn’t exactly a farmhouse porch, but it was a comfy couch watching college rugby finals. Not quite the same, but I’ll take it none-the-less.
I had recently read a recipe for peas with prosciutto, which sounded amazing. We did make that, but since I just read about it on another blog, it felt wrong to poach it so soon. I do recommend that you try this recipe though. Plus when you tell the two sisters who sold you the peas and prosciutto that was your plan and they oooh and aahhhh, you know you have a good thing on your hands.
Besides cooking peas, I have really been testing the “What grows together, Goes together” mantra that so often gets tossed around by chefs and foodies. Well let me tell you – it works. As Joe can attest, I have been plucking a medley of fresh leaves from our garden that on their own are not ready to eat, but mixed together can produce a nice little meal. I have been just chucking these greens into a sauté pan and then tossing them with pasta. Which turns out well, although there really isn’t any forethought with them.
But when I saw mini red potatoes, and small shell peas at the farm stand in our town, I couldn’t resist. A warm potato, pea and radish salad sounded fantastic. And it was. So once again “What Grows Together, Goes Together” really holds true.
Potato, Pea, and Radish salad with Basil Red Wine Vinaigrette
I happened to also pick a small (tiny) beet out of the garden the other day, just to see how big it was. So if you happen to have any radish sized beets lying around feel free to add this to the mix.
½ lb small red potatoes, or larger potatoes cut into large chunks
¼ c red onion, diced
½ c small shell peas, washed but left intact
½ c fresh green beans, tips snapped off
¼ radishes, sliced thinly into rounds
For the Vinaigrette
1 Tb red wine vinegar
1 clove garlic, finely chopped
1 squirt of Dijon mustard (about 1 tsp)
3 Tb Olive oil
A few leaves of fresh Basil, chopped
Good pinch of Salt and fresh ground pepper
Wash potatoes, and place in a large pot of cool salted water. Set pot on stove and bring to a boil. Cook potatoes until almost fork tender. Add peas, beans and beats (if using) and blanche for about 2 minutes. Drain the vegetables and run cold water over them to cool. They should still be warm, but not too warm to handle. Slice potatoes in half, or if using chucks leave as is. In the still warm pot that was used for the boiling, toss in red onion to allow to soften just a bit. Then add back in the vegetables as well as the sliced radishes.
To make the vinaigrette, add all ingredients into a small jar or salad dressing shaker. Close tightly and shake vigorously for about a minute until it has emulsified (the mustard helps with this). Pour over vegetables in pot and stir to coat, being careful not to break up potatoes.
Serve warm, or let cool and store in refrigerator until ready to serve.
The one thing I had always wanted to try was fresh shelled peas. It coincides with my early 20th century fantasy about sitting on a porch shelling peas – I probably read at least 20 books growing up where that scenario took place. And finally, this weekend I got my wish (kind of). It wasn’t exactly a farmhouse porch, but it was a comfy couch watching college rugby finals. Not quite the same, but I’ll take it none-the-less.
I had recently read a recipe for peas with prosciutto, which sounded amazing. We did make that, but since I just read about it on another blog, it felt wrong to poach it so soon. I do recommend that you try this recipe though. Plus when you tell the two sisters who sold you the peas and prosciutto that was your plan and they oooh and aahhhh, you know you have a good thing on your hands.
Besides cooking peas, I have really been testing the “What grows together, Goes together” mantra that so often gets tossed around by chefs and foodies. Well let me tell you – it works. As Joe can attest, I have been plucking a medley of fresh leaves from our garden that on their own are not ready to eat, but mixed together can produce a nice little meal. I have been just chucking these greens into a sauté pan and then tossing them with pasta. Which turns out well, although there really isn’t any forethought with them.
But when I saw mini red potatoes, and small shell peas at the farm stand in our town, I couldn’t resist. A warm potato, pea and radish salad sounded fantastic. And it was. So once again “What Grows Together, Goes Together” really holds true.
Potato, Pea, and Radish salad with Basil Red Wine Vinaigrette
I happened to also pick a small (tiny) beet out of the garden the other day, just to see how big it was. So if you happen to have any radish sized beets lying around feel free to add this to the mix.
½ lb small red potatoes, or larger potatoes cut into large chunks
¼ c red onion, diced
½ c small shell peas, washed but left intact
½ c fresh green beans, tips snapped off
¼ radishes, sliced thinly into rounds
For the Vinaigrette
1 Tb red wine vinegar
1 clove garlic, finely chopped
1 squirt of Dijon mustard (about 1 tsp)
3 Tb Olive oil
A few leaves of fresh Basil, chopped
Good pinch of Salt and fresh ground pepper
Wash potatoes, and place in a large pot of cool salted water. Set pot on stove and bring to a boil. Cook potatoes until almost fork tender. Add peas, beans and beats (if using) and blanche for about 2 minutes. Drain the vegetables and run cold water over them to cool. They should still be warm, but not too warm to handle. Slice potatoes in half, or if using chucks leave as is. In the still warm pot that was used for the boiling, toss in red onion to allow to soften just a bit. Then add back in the vegetables as well as the sliced radishes.
To make the vinaigrette, add all ingredients into a small jar or salad dressing shaker. Close tightly and shake vigorously for about a minute until it has emulsified (the mustard helps with this). Pour over vegetables in pot and stir to coat, being careful not to break up potatoes.
Serve warm, or let cool and store in refrigerator until ready to serve.
Wednesday, June 2, 2010
Last Minute Brownies
It’s always good to have a few recipes that you can pull out at the last second, which you may know by heart, to produce something delicious. Especially when you have just come home from work and your upstairs neighbors have asked you over for pizza and beer in 15 minutes.
Now I’m not saying this recipe can be made from start to finish in 15 minutes, but you can always bring this in batter form upstairs and finish baking it in their oven. This is one of those recipes that is quick, can be made from staples found in most pantries and is pretty gosh darn delicious.
Brownies from scratch are usually pretty impressive – and under normal circumstances do take a little foresight and time. But not these. And these have icing. ICING. And in fact you can substitute and work with whatever you have. Like when you are snowed in at your boyfriend’s brother’s house with some “staples” that are approximately ten years old in the pantry.
Now don’t get me wrong, some boxed brownie mixes are very good and require very little effort. Growing up we made a lot of boxed brownies, and I would like to consider myself a connoisseur. We always had those in the pantry in case my dad invited people over for a meal we had not planned for, or if friends came over and stayed unannounced.
These brownies still get that crispy edge that some people really enjoy. In fact some people enjoy the edges so much there is now an ‘as seen on tv’ insert for your brownie pan which will allow for every brownie to be an edge brownie. This is not something I desire. I never really liked the edges, and when I divulged this to Joe recently he was a little taken aback. I prefer the center brownie in which nearly every bite has the same chew to it as the last. I seem to remember trying to cut a perfect square out of the center of a fresh baked pan of brownies as a child – to the chagrin of my mother. But I have grown up a little and will tolerate an edge brownie as long as it is dense, chewy and above all chocolaty.
The Easiest Scratch Brownies
As adapted by “Angie” on allrecipes.com (over 2,900 people love this version by the way)
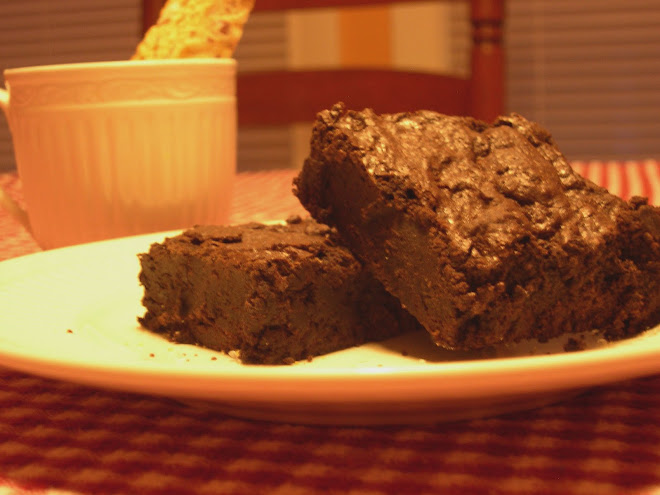
You can substitute different extracts for vanilla and you can use whole wheat flour for all purpose. Feel free to double or triple this recipe to suit your needs. It makes a thin brownie in an 8”pan with a single batch – so switch pans or increase batches for a thicker brownie. I used the Hershey’s Special Dark cocoa powder for these, which is why they are very dark in color.
For the Brownies
½ c butter
1 c sugar
2 eggs
1 tsp vanilla
1/3 c cocoa powder
½ c flour
¼ tsp baking powder
Pinch of salt
For the Icing
3 Tbs butter
3 Tbs cocoa powder
1 Tbs honey
1 tsp vanilla
1 c confectioner’s sugar
A little milk as needed to thin the icing (start with 1 tsp at a time).
Preheat oven to 350°F. Grease an 8” square baking pan.
Melt the butter in a sauce pan, and then remove from heat. Stir in sugar and mix in eggs and vanilla. Then add cocoa powder, flour, baking powder and salt; stir until just combined.
Pour batter into greased pan and bake for 20-25 minutes until a toothpick inserted into the center comes out clean. Bake for longer if doubling the recipe or using a smaller pan.
While the brownies are baking, prepare icing.
Melt the butter, and mix together with honey, vanilla, cocoa powder and confectioner’s sugar. Add in milk if the icing seems a little stiff. When the brownies have mostly cooled spread icing on top. Serve brownies slightly warm.
Now I’m not saying this recipe can be made from start to finish in 15 minutes, but you can always bring this in batter form upstairs and finish baking it in their oven. This is one of those recipes that is quick, can be made from staples found in most pantries and is pretty gosh darn delicious.
Brownies from scratch are usually pretty impressive – and under normal circumstances do take a little foresight and time. But not these. And these have icing. ICING. And in fact you can substitute and work with whatever you have. Like when you are snowed in at your boyfriend’s brother’s house with some “staples” that are approximately ten years old in the pantry.
Now don’t get me wrong, some boxed brownie mixes are very good and require very little effort. Growing up we made a lot of boxed brownies, and I would like to consider myself a connoisseur. We always had those in the pantry in case my dad invited people over for a meal we had not planned for, or if friends came over and stayed unannounced.
These brownies still get that crispy edge that some people really enjoy. In fact some people enjoy the edges so much there is now an ‘as seen on tv’ insert for your brownie pan which will allow for every brownie to be an edge brownie. This is not something I desire. I never really liked the edges, and when I divulged this to Joe recently he was a little taken aback. I prefer the center brownie in which nearly every bite has the same chew to it as the last. I seem to remember trying to cut a perfect square out of the center of a fresh baked pan of brownies as a child – to the chagrin of my mother. But I have grown up a little and will tolerate an edge brownie as long as it is dense, chewy and above all chocolaty.
The Easiest Scratch Brownies
As adapted by “Angie” on allrecipes.com (over 2,900 people love this version by the way)
You can substitute different extracts for vanilla and you can use whole wheat flour for all purpose. Feel free to double or triple this recipe to suit your needs. It makes a thin brownie in an 8”pan with a single batch – so switch pans or increase batches for a thicker brownie. I used the Hershey’s Special Dark cocoa powder for these, which is why they are very dark in color.
For the Brownies
½ c butter
1 c sugar
2 eggs
1 tsp vanilla
1/3 c cocoa powder
½ c flour
¼ tsp baking powder
Pinch of salt
For the Icing
3 Tbs butter
3 Tbs cocoa powder
1 Tbs honey
1 tsp vanilla
1 c confectioner’s sugar
A little milk as needed to thin the icing (start with 1 tsp at a time).
Preheat oven to 350°F. Grease an 8” square baking pan.
Melt the butter in a sauce pan, and then remove from heat. Stir in sugar and mix in eggs and vanilla. Then add cocoa powder, flour, baking powder and salt; stir until just combined.
Pour batter into greased pan and bake for 20-25 minutes until a toothpick inserted into the center comes out clean. Bake for longer if doubling the recipe or using a smaller pan.
While the brownies are baking, prepare icing.
Melt the butter, and mix together with honey, vanilla, cocoa powder and confectioner’s sugar. Add in milk if the icing seems a little stiff. When the brownies have mostly cooled spread icing on top. Serve brownies slightly warm.
Subscribe to:
Posts (Atom)